I have not said goodbye to cozy comfort food just yet and I am glad I didn’t as the weather has taken a bit of a turn the past couple of days. I’m typing this as I procrastinate my run – it’s really cold and windy out and I simply don’t fancy it today. I will go, but want to stay in the warmth a little bit longer…
Today’s dish is a twist on my vegan gnocchi bake with mushrooms and broccoli, which so many of you love. This time, I’ve made with staple winter vegetables: Brussels sprouts and leeks. I had a couple of leeks gifted to me by a friend (thanks Shelley!) who had a surplus from her veg delivery box and I had some forsaken Brussels sprouts at the back of my fridge. I was racking my brain on how to put them to a good use until this idea came about. I tested it for one of our dinners and it was an instant hit.
It’s a simple dish to make and does not require much work, but it’s well worth the effort. Because I am a (recovering) perfectionist, I felt compelled to add an extra element to this dish to give it another dimension of flavour and texture. I made a tray of vegan bacon (or facon) bits that get baked in the oven while you crack on with the bake and finish off on the dish itself. They add delicious pops of flavour and a bit of a different texture. While I think they are worth the effort, this dish is still delicious without them. If you like the idea, but for whatever reason don’t want to use tofu, use flaked almonds, like in this recipe.
This winter gnocchi bake is really simple to make and only requires a few, easy to get, ingredients. You will find them in any well-stocked supermarket during winter time. Let’s go through the main ones…
MORE ABOUT THE INGREDIENTS
TOFU: This is an optional ingredient, only needed if you want to make vegan bacon bits (they are worth it though!). You’ll need firm or extra firm tofu (I used Dragonfly brand this time). You need to press it well to extract excess water out of it and to allow it to absorb the marinade.
GNOCCHI: Shop-bought, vacuum packed gnocchi works well here, just be sure to check the ingredients on the packet as some brands contain eggs or powdered milk. Be sure to purchase a brand without wheat flour for the gluten-free version of this dish. I have not tested this dish with homemade gnocchi as I was after a speedy dinner, but I suspect that they may be a little too fragile for this application.
BRUSSELS SPROUTS: Brussels sprouts (aka baby cabbages) are so cute, aren’t they? and so good for you. I cut them in half, char a little and then they finish off cooking in the bake, in the oven.
LEEKS: Leeks get beautifully creamy when baked in a sauce and they add so much flavour. The only trick with leeks is to wash them well (without disturbing the layers) as they are prone to hiding a lot of grit.
FLOUR: Flour needs no introduction, it is used to create a roux (thickened creamy sauce). I use all purpose flour, but if you are gluten-free, chickpea flour (besan/gram flour) works well too.
PLANT MILK: Any plant milk will work here. I used soy, sometimes oat, sometimes almond. Use whatever plant milk you like the taste of, apart from coconut milk – that would be weird, I think…
THYME: A bit of fresh thyme adds flavour here. Rosemary would make for a nice substitute. If using dried herbs, crush them between your fingers well and use sparingly as they are more potent than fresh (provided they have not gone stale, of course).
MISO: White miso paste, which is a less assertive cousin of red miso paste, is used here to add umami and savouriness to the sauce. It is widely available these days, but you can skip it and add another tablespoon of nutritional yeast if that’s what you have. If you are making this dish gluten-free, look for miso that is based on chickpeas, brown rice, millet etc., rather than wheat.
DIJON MUSTARD: Dijon mustard adds a hint of heat to the sauce, which helps to cut through its richness.
NUTRITIONAL YEAST: Nutritional yeast, which is a staple vegan seasoning made out of inactive yeast, gives the sauce a hint of depth and cheese-like flavour.
GARLIC: I use a couple of cloves of garlic to flavour the roux. They get sauteed in oil before any flour is added.
HAZELNUTS: I add a handful of halved hazelnuts in at the end for a lovely crunch and to keep the texture of this dish varied and interesting. Pine nuts, walnuts or almonds would also work.
My recipe includes an optional topping of vegan bacon (facon, if you like) bits. It’s totally optional althought it does add another layer of texture and flavour, plus it’s low on effort and only uses pantry staples so I recommend making it if you have time. The only thing that it needs is some planning as tofu needs marinating at least 2 hours in advance, several hours in advance is even better.
I bake marinated tofu just before I am ready to bake the gnocchi and scatter it on top of the gnocchi bake for the final 10 minutes of baking time.
Start off by prepping your vegetables, washing and drying them well. Once clean and dry, pan-fry them gently in a little oil in the same pan you will be making your bake, just until charred – they will finish off in the oven.
Make the sauce in the same pan you used to char your veggies – I did not wash mine, all the burnt bits get deglazed once the milk has been added. Once the sauce is ready, add raw gnocchi, charred Brussel sprouts and leeks. Cover and bake uninterrupted for about 15 minues.
Scatter hazelnuts and pre-baked bacon bits (if making) on the top of the bake for the last 10 minutes of baking time and bake until everything looks golden and gnocchi is cooked through. Divide between plates and enjoy!
VEGAN ‘BACON’ BITS (optional, marinate ahead)
30 ml / 2 tbsp all purpose soy sauce (or tamari if GF)
approx. ½ -1 tsp salt flakes (for the entire dish)
15 ml / 1 tbsp lemon juice, more to taste
REMAINING INGREDIENTS
500 g / 17.5 oz shop-bought gnocchi** (gluten-free if needed)
15 ml / 1 tbsp olive oil
250 g / 8.5 oz Brussels sprouts
125 g / 1 leek
20 g / 2 tbsp hazelnuts, halved
vegan bacon bits (optional), shop-bought or see above
METHOD
VEGAN ‘BACON’ BITS (optional, marinate ahead)
Combine the first six ingredients in a small tin.
Cut pressed tofu into 1 cm / 0.4″ dice, I left a few pieces double the size for varied texture.
Coat tofu in the marinade and let it marinate for as long as possible. Overnight is best, 2 hours will do.
Just before you are ready to bake your gnocchi, preheat the oven to 200° C / 390° F and spread marinated tofu on a large baking tray.
Bake for 15 minutes, then coat in olive oil and bake for another 10 minutes. We will finish it off on the bake, keep the oven on for the bake.
CHARRING VEGGIES
Cut dark green part of the leek off and discard (or use in homemade stock). Cut the rest of the leek in half lengthwise, gently clean with water in between the layers trying to keep them nested inside each other. Dry well and cut into 2.5 cm / 1 inch segments.
Trim Brussels sprouts, remove and discard the exterior leaves. Clean trimmed sprouts under the tap if dirty, dry really well and slice in half lengthwise.
Preheat a medium ovenproof dish (I used a 26 cm / 10.2 inches cast iron casserole dish) on the stovetop, on low-medium heat.
Add 1 tbsp of olive oil and once it heats up, arrange halved Brussels sprouts and leeks (cut side down) on top. Allow the veggies to char, remove from the pan and set aside. Allow the pan to cool a little before next step.
BECHAMEL
If you are skipping tofu becon bits, preheat the oven to 200° C / 390° F (otherwise your oven should be already on).
Heat up olive oil in the same dish you charred the veggies in (I do not wash between stages). Add diced garlic and sautee in on a low heat stirring all the time.
Once the garlic looks cooked, add flour. Mix it into the oil with a spatula and allow it to cook (it should bubble gently) for a whole minute. Do not let it brown, we only just want to cook off the raw flour taste.
Next, gradually add plant milk while stirring the whole time. Allow the mixture to simmer gently until it thickens.
Season with miso, mustard, nutritional yeast, thyme leaves, salt, pepper and a good squeeze of lemon to cut through the richness. Taste and adjust the seasoning remembering that vegetables and gnocchi go in unseasoned.
ASSEMBLY
Add raw gnocchi to the bechamel. Arrange charred Brussels sprouts and leek segments in between the gnocchi.
Cover the dish with a lid or tightly with a piece of kitchen foil and allow it to bake uninterrupted for 15 minutes.
After 15 minutes, uncover and bake for a further 10, then scatter hazelnuts and bacon bits (you will have some left over) on top and bake for further 10 minutes until everything is beautifully browned and gnocchi is knife tender. Divide between bowls and enjoy immediately.
NOTES
*MISO: If wanting to keep this dish gluten-free, make sure to use a gluten-free miso paste – made with chickpeas, rice, millet, amaranth or quinoa instead of wheat, barley or rye.
*GNOCCHI: Be sure to check that your shop-bought gnocchi is vegan as some supermarket brands add milk. I have not tried making this dish with homemade gnocchi, but I believe that it will work just as well.
Celery juice is a delicious, refreshing, and nutritious drink that can be enjoyed at any time of the day. It has become increasingly popular in recent years due to its many health benefits, and it can be made easily with just a few simple ingredients. If you’re looking for a way to add more nutrition to your diet, then celery juice is a great option. In this blog, we’ll be exploring everything you need to know about celery juice, from its benefits to different ways of making it, and even some delicious recipes you can try out.
Photo byRohtopia onPixabay
Introduction to Celery Juice
Celery juice is a simple drink made from the juice of celery stalks. It’s a great source of essential vitamins and minerals, including vitamins A, C, and K, as well as potassium, folate, and magnesium. Celery juice is also high in antioxidants and can help to reduce inflammation in the body. It has a mild, slightly sweet taste and is perfect for blending into smoothies or adding to other juices.
Celery juice has become increasingly popular due to its many health benefits. It can help to support the immune system, reduce inflammation, and aid in digestion. It can also help to detoxify the body, reduce blood pressure, and support the liver and kidneys. Additionally, celery juice is believed to help reduce bloating and improve skin health.
Benefits of Celery Juice
There are numerous benefits to drinking celery juice on a regular basis. First and foremost, it can help to boost the immune system and reduce inflammation in the body. This can help to prevent or reduce the severity of common illnesses and diseases. Additionally, celery juice can help to improve digestion and reduce bloating. It can also help to detoxify the body, remove toxins, and reduce blood pressure. Furthermore, celery juice is believed to help support the liver and kidneys, as well as improve skin health.
How to Choose Celery
When purchasing celery for juicing, it’s important to choose stalks that are firm and crisp. Avoid stalks that are limp or wilted, as they will likely not produce as much juice. It’s also important to look for organic or pesticide-free celery, as conventional celery can be high in pesticides.
Once you have selected the celery, it’s important to rinse it thoroughly before juicing. This will help to remove any dirt or debris that may have been on the stalks. If you’re using a juicer, it’s best to cut the celery into smaller pieces before juicing in order to get the most juice out of it.
How to Make Celery Juice
Making celery juice is simple and straightforward. All you need is a blender or juicer, a few stalks of celery, and some water. If you’re using a juicer, simply cut the celery into smaller pieces and feed them into the juicer. If you’re using a blender, add the celery and water, and blend until smooth. Strain the juice through a cheesecloth or fine mesh strainer to remove any pulp.
Different Ways to Make Celery Juice
There are several ways to make celery juice. The most common way is to use a juicer, however, if you don’t have one, you can still make celery juice in a blender. Simply add the celery and water to the blender and blend until smooth. Then, strain the juice through a cheesecloth or fine mesh strainer to remove any pulp. You can also add other ingredients, such as lemon juice or ginger, to the blender to enhance the flavor of the juice.
Tips for Making Celery Juice
When making celery juice, there are a few tips to keep in mind. First, start with fresh celery stalks that are firm and crisp. Avoid limp or wilted stalks, as they will produce less juice. Additionally, it’s best to rinse the celery before juicing to remove any dirt or debris. Finally, if you’re using a blender to make the juice, it’s best to strain the juice through a cheesecloth or fine mesh strainer to remove any pulp.
Different Ways to Drink Celery Juice
There are several ways to enjoy celery juice. It can be enjoyed on its own or blended into a smoothie. You can also add it to other juices or drinks, such as lemonade or iced tea. Additionally, celery juice can be used as a base for salad dressings or sauces.
Different Recipes for Celery Juice
There are a variety of recipes for celery juice that you can try out. Here are just a few:
Celery, Cucumber, and Lemon Juice: Blend 2 stalks of celery, 1 cucumber, and the juice of 1 lemon. Strain through a cheesecloth or fine mesh strainer.
Apple, Celery, and Ginger Juice: Blend 1 apple, 2 stalks of celery, and a small piece of ginger. Strain through a cheesecloth or fine mesh strainer.
Carrot, Celery, and Orange Juice: Blend 1 carrot, 2 stalks of celery, and the juice of 1 orange. Strain through a cheesecloth or fine mesh strainer.
How to Make Celery Juice Taste Better
If you find that celery juice is too strong for your taste, there are a few ways to make it taste better. First, you can add a bit of lemon or lime juice to the juice to give it a bit of sweetness. You can also add other fruits or vegetables, such as apples, carrots, or cucumbers, to the juice to give it more flavor. Additionally, you can add a bit of honey or agave nectar to the juice to sweeten it.
Celery Juice Detox & Cleanse
Celery juice has become increasingly popular as a detox and cleanse drink. It is believed to help flush toxins from the body and reduce bloating and inflammation. Additionally, it can help to improve digestion and reduce fatigue. To make an effective celery juice detox and cleanse, simply drink 16 ounces of fresh celery juice on an empty stomach every morning.
Conclusion
In conclusion, celery juice is a delicious, refreshing, and nutritious drink that can be enjoyed at any time of the day. It has numerous health benefits, including boosting the immune system and reducing inflammation. Additionally, it can help to detoxify the body, reduce bloating, and improve digestion. To make celery juice, simply blend or juice celery stalks with water and strain through a cheesecloth or fine mesh strainer. You can also add other fruits or vegetables, such as apples, cucumbers, or carrots, to enhance the flavor. Finally, you can make a celery juice detox and cleanse by drinking 16 ounces of fresh celery juice on an empty stomach every morning.
If you’re looking to add more nutrition to your diet, then celery juice is an excellent option. With its many health benefits and delicious taste, it’s no wonder that celery juice has become so popular in recent years. So, what are you waiting for? Grab some celery and get juicing!
Some of the links I post on this site are affiliate links. If you go through them to make a purchase, I will earn a small commission (at no additional cost to you). However, note that I’m recommending these products because of their quality and that I have good experience using them, not because of the commission to be made.
About Juicing For Health
Juicing for Health was founded by certified Wellness Health Coach, Nutritional Consultant and a Detox Specialist. We help busy men and women identify their health issues at the root cause, in order to eliminate the problems for optimum physical/mental health and wellbeing.
This Vegan Boston Cream Pie Cake makes for a marvelous celebration cake! Vegan sponge cake filled with vegan vanilla custard and topped with chocolate ganache. Gluten-free option and nut-free option included.
Meet your new favorite celebration cake – Vegan Boston Cream Pie Cake! This one has become a family favorite in record time and once you have tried it once you will understand why. It’s moist yet light with a rich, smooth vegan vanilla custard filling and a decadent chocolate ganache on top. Not too sweet and perfect for dessert, breakfast with berries or snack!
I mean, chocolate and vanilla is just such a classic combination and pretty hard to beat. The vanilla custard is made by simmering homemade cashew cream with some thickening agents as well as vanilla and a touch of turmeric for that signature yellow color that we expect from Boston Cream Pie.
Don’t worry if you end up with some leftovers! This cake stays moist for days! Serve with a big dollop vegan custard on top for the ultimate treat.
This Vegan Boston Cream Cake makes for a marvelous celebration cake that kids and adults will love. Vegan sponge cake filled with vegan vanilla custard and topped with chocolate ganache. Gluten-free option and nutfree option included.
Prep Time10mins
Cook Time40mins
Chill time30mins
Total Time1hr20mins
Course: cake, Dessert
Cuisine: American
Keyword: boston cream pie vegan, vegan celebration cake
Servings: 12
Calories: 257kcal
Author: Vegan Richa
Ingredients
Wet ingredients:
1cup(236.59ml)plus 2 tablespoons non-dairy milk
2tablespoonsapplesauce
1teaspoonwhite or apple cider vinegar
1/3cup(65g)sugaruse 1-2 tablespoons more for sweeter
3tablespoonsoil
1teaspoonvanilla extract
4drops of almond extract
Dry Ingredients:
1 1/2cup(185g)all purpose flour,fluff the flour and measure
2teaspoonsflaxseed meal
1tablespooncornstarch or tapioca starch
1 1/2teaspoonsbaking powder
1/4teaspoonsalt
For the custard:
1/2cup(64.5g)raw cashews
2cups(473.18ml)water
1/2teaspoonvanilla extract or powder
1/4teaspoonalmond extract
1/8teaspoonturmeric
1tablespooncornstarch or tapioca starch or arrowroot starch
1teaspoonflour or omit to make it gluten free
3tablespoonssugar,use 1/2 tablespoon more for sweeter
For the chocolate topping:
Instructions
Make the cake: In a bowl, combine all the wet ingredients for the cake. Mix really well until the sugar is well dissolved.
Then add the flour, flax meal, cornstarch, baking powder, and salt on top of the wet ingredients.
Use a whisk or spatula to mix in the dry ingredients above the wet ingredients so the baking powder, salt mixed into the flour, then slowly mix it into the wet ingredients.
You can also mix the dry ingredients in a separate bowl and then add in the wet ingredients. Add half first and mix in lightly then add in the rest of the half and mix in to make a batter. If the batter is too thick, add in 1-2 teaspoons more non-dairy milk and mix in.
Line an 8 inch or a 9 inch round cake pan with parchment and grease the sides then pour the batter into the cake pan.
Even it out on top then bake at 350 degrees Fahrenheit (180 degrees Celsius) for 25 minutes. Check at the 25 minute mark. If the cake is not done yet, bake for another 5 minutes.
Remove the cake from the oven and let it sit for 10 minutes to cool and then remove from the pan. To cool the cake completely, cover it with a kitchen towel and put it in the fridge.
Make the custard: Blend the cashews, water, vanilla, almond extracts, turmeric, sugar, and cornstarch, and flour. Blend for 1 minute then let this mixture sit for 5 minutes. Then blend again. Repeat for another 2 times until the cashews are well blended in.
(You can also soak the cashews in hot water for 15 minutes and Drain and then use. Usually blending and waiting works out really well even if they’re not soaked.)
Transfer this mixture to a saucepan over medium heat. After a minute or so, start whisking a bit so that the bottom doesn’t scorch.
After another few minutes, the custard will start boiling. As it boils, it will thicken unevenly and look lumpy. As you keep whisking, it will become smooth. Let the custard boil consistently for a minute and thicken and then take off heat.
Let the custard cool. Put it in the fridge for about half an hour.
Just before you are ready to assemble, make your chocolate frosting: Add the coconut cream and maple syrup to a small skillet over medium heat.
Once the coconut cream and maple mixture starts boiling, whisk really well to mix in. Then take off heat and Add the chocolate. whisk until the chocolate is well-melted.
Remove the cake from the fridge. Using a really sharp knife, slice it into 2 layers.
Remove the custard from the fridge as well. Add a thick layer of custard on one of the slices, even it out with a spatula. Then put the other slice on top.
Keep the custard layer at 3-4 mm thick , if it’s too thick it will ooze out too much when you slice The assembled cake. Use any remaining custard to serve separately.
If the chocolate is too thin, freeze it for 15 minutes so that the consistency thickens a little bit and is easier to spread. Or refrigerate it for half an hour so that this is more like a frosting and then spread it.
Pour the chocolate ganache all over the cake and spread it out with a spatula. Also spread it on the sides.
Once it is spread evenly, let the cake chill in the fridge for half an hour so that the chocolate sets. Slice it and serve it with an extra helping of the custard. Store the cake refrigerated for upto 4 days .
Notes
Gluten-free: use 1 cup almond flour, 1/2 cup oat flour, and 1/3 cup potato starch. Mix really well. Add 1 1/2 cups of this flour to the wet mix along with the flax seed meal, baking powder, and salt. omit the cornstarch. mix in. If the batter is too liquidy, add in the rest of the flour, a tablespoon at a time. For the wet ingredients, use 3/4 cup of non-dairy milk and 1/4 cup of club soda instead of the 1 cup and 2 tablespoons of non-dairy milk.To make the custard Nutfree, you can use more cornstarch. I don’t particularly like that texture and that custard also won’t hold up much for a thick enough layer. But you can serve with extra custard on the side
Nutrition
Nutrition Facts
Boston Cream Pie Cake
Amount Per Serving
Calories 257Calories from Fat 108
% Daily Value*
Fat 12g18%
Saturated Fat 4g25%
Polyunsaturated Fat 2g
Sodium 62mg3%
Potassium 145mg4%
Carbohydrates 36g12%
Fiber 2g8%
Sugar 19g21%
Protein 4g8%
Vitamin A 78IU2%
Vitamin C 1mg1%
Calcium 82mg8%
Iron 2mg11%
* Percent Daily Values are based on a 2000 calorie diet.
Ingredients:
as dry ingredients we use a blend of all purpose flour, cornstarch and flaxseed meal
non-dairy milk and neutral tasting oil is added for moisture
apple sauce is added for moisture
white or apple cider vinegar reacts with the baking powder for the perfect rise
for sweetening both cake layers and custard we use regular cane sugar
vanilla extract and almond extract add that signature flavor to the sponge
For the custard, we blend raw cashews with vanilla extract and almond extract
as we don’t add any egg yolks to the custard, we add some turmeric to our custard to get that nice yellow color
flour, cornstarch or tapioca starch or arrowroot starch helps thicken the custard while cooking
for the chocolate ganache topping we melt vegan semi sweet chocolate chips with coconut cream and maple syrup
Tips:
For making this cake gluten-free, use 1 cup almond flour, 1/2 cup oat flour, and 1/3 cup potato starch. Mix really well. Add 1 1/2 cups of this flour to the wet mix along with the flax seed meal, baking powder, and salt. omit the cornstarch. mix in. If the batter is too liquidy, add in the rest of the flour, a tablespoon at a time. For the wet ingredients, use 3/4 cup of non-dairy milk and 1/4 cup of club soda instead of the 1 cup+ 2 tablespoons of non-dairy milk.
To make the custard Nutfree, you can use more cornstarch. I don’t particularly like that texture and that custard also won’t hold up much for a thick enough layer. But you can serve it as extra custard on the side
How to make Vegan Boston Cream Pie Cake
Make the cake: In a bowl, combine all the wet ingredients for the cake. Mix really well until the sugar is well dissolved.
Then add the flour, flax meal, cornstarch, baking powder, and salt on top of the wet ingredients.
Start mixing the top dry ingredients first so the baking powder salt etc mix into the flour , before mixing in into the wet. Use a whisk or spatula to mix in the dry ingredients above the wet ingredients and then slowly mix them into the wet ingredients.
You can also mix the dry ingredients in a separate bowl and then add in the wet ingredients. Add half first and mix in lightly then add in the rest of the half and mix in to make a batter. If the batter is too thick, add in 1-2 teaspoons more non-dairy milk and mix in.
Line an 8 inch or a 9 inch round cake pan with parchment and grease the sides then pour the batter into the cake pan.
Even it out on top then bake at 350 degrees Fahrenheit (180 degrees Celsius) for 25 minutes. Check at the 25 minute mark. If the cake is not done yet, bake for another 5 minutes.
Remove the cake from the oven and let it sit for 10 minutes to cool and then remove from the pan. To cool the cake completely, cover it with a kitchen towel and put it in the fridge.
Make the custard: Blend the cashews, water, vanilla, almond extracts, turmeric, sugar, and cornstarch, and flour. Blend for 1 minute then let this mixture sit for 5 minutes.
Then blend again. Repeat for another 2 times until the cashews are well blended in.
(You can also soak the cashews in hot water for 15 minutes, then drain and use. Usually blending and waiting works out really well even if they’re not soaked.)
Transfer this mixture to a saucepan over medium heat. After a minute or so, start whisking a bit so that the bottom doesn’t scorch.
After another few minutes, the custard will start boiling slowly. As it boils, it will thicken unevenly and look lumpy. As you keep whisking, it will become smooth. Let the custard boil consistently for a minute and thicken and then take off the heat.
Let the custard cool completely before assembly. put it in the fridge for about half an hour.
Just before you are ready to assemble, make your chocolate frosting: Add the coconut cream and maple syrup to a small skillet over medium heat.
Once the coconut cream and maple mixture starts boiling, whisk really well to mix in. Then take off heat.
Add the chocolate.
Whisk until the chocolate is well-melted.
Remove the cake from the fridge. Using a really sharp knife, slice it into 2 crosswise to get 2 cake layers .
Remove the custard from the fridge as well. Add a thick layer of custard on one of the slices, even it out with a spatula. Then put the other slice on top.
Keep the custard layer at 3-4 mm thick , if it’s too thick it will ooze out too much when you slice the cake. Reserve any remaining custard to serve separately.
Pour the chocolate ganache all over the cake and spread it out with a spatula. Also spread it on the sides.
If the chocolate is too thin, freeze it for 10-15 minutes so that the consistency thickens a little bit and is easier to spread. Or refrigerate it for half an hour so that this is more like a frosting and then spread it.
Once it is spread evenly, let the cake chill in the fridge for half an hour so that the chocolate sets. Slice it and serve it with an extra helping of the custard.
Storage Store refrigerated in a closed container for upto 4 days. Let the cake slices warm up on the counter for 15 mins before serving.
Rolled or steel-cut, ground into flour or blended into plant milk, oats are inexpensive, easy to prepare, and naturally gluten-free (with an important caveat; see below). Here’s everything you need to know about a humble whole grain with impressive health benefits and culinary versatility.
Oats vs. Oatmeal
Technically speaking, “oats” is the word for raw oat groats as well as the plant and the harvested cereal crop. Oatmeal refers to oat groats that have been minimally processed (i.e., rolled, ground, or steel-cut) for culinary uses, including hot cereal. These days, the terms are used interchangeably and can refer to ingredients or prepared dishes. Oat bran, which is the outer coating of the oat groat, is marketed and used just like oatmeal.
The Winter 2023 Issue is here!
Our gorgeous “bookazine” features expert tips, inspiration, and 81 comforting recipes for Winter.
Are Oats Gluten-Free?
Oats themselves do not contain gluten, a protein specific to the wheat family of cereal grains, but oat crops often become cross-contaminated with wheat both in the field and during processing. That means that the end products can contain traces of gluten. Cooks who are highly sensitive to gluten or have celiac disease should opt for oat products that are processed in wheat-free plants and labeled as certified gluten-free. Oats also contain avenin, a protein similar to gluten that has been shown to exacerbate symptoms in a small percentage of people with celiac disease.
Oats and Heart Disease
You may have seen labels on oat products that say things like “Oats can help lower cholesterol” and “Helps lower cholesterol.” These aren’t just marketing gimmicks. Virtually all whole plant foods contain some soluble fiber, but oats are an especially good source of it—particularly beta-glucan, a soluble fiber that has been shown to be effective at lowering cholesterol. In 1997, the FDA determined that daily consumption of 3 grams or more of beta-glucan soluble fiber from oats was associated with reduced risk of heart disease.
The soluble fiber in oats has been shown to increase satiety (make you feel fuller longer) and improve gut health. Oats also contain anti-inflammatory compounds, which is why they are often used in anti-itch creams, soothing lotions, and soaps. These compounds may help reduce chronic inflammation.
It’s important to note that these health benefits are associated with the consumption of minimally processed oats. Ultraprocessed products, even those that contain oats or oat-derived ingredients, typically contain less fiber and high amounts of fat and added sugar and salt.
Different Types of Oatmeal
There are three different types of oatmeal available: rolled oats, steel-cut, and ground oats.
Rolled Oats
Rolled oats are oat groats that have been steamed then rolled between steel rollers to flatten them into quick-cooking flakes. There are a few different forms of rolled oats: instant, quick, old-fashioned, and thick-cut or extra-thick. The only difference between them is the flakes’ thickness. The thinner the oats are rolled, the faster they cook. None of the oats’ fiber is lost in the process, so choosing one type of rolled oat over another is a matter of taste and preference. (Note: If you choose instant oats, look for oats-only options rather than more processed versions with added sugar and salt.) Extra-thick and old-fashioned rolled oats will be firmer and chewier than quick or instant oats and take 2 to 3 minutes longer to cook.
Steel-Cut/Irish/Pinhead Oats
The coarse-style oatmeal favored in Ireland is made by splitting each groat into two or three pieces. Steel cut oats need 15 to 25 minutes of cooking time, but the results are a hearty hot cereal that’s deliciously chewy.
Scottish Oats
Also known as porridge, Scottish oats are whole oat groats that have been ground into small pieces. They cook in 10 minutes and have a creamy, uniform texture.
Pro Tip: 2 Minutes Is All It takes for Perfection
The secret to perfectly creamy oatmeal? Letting it rest two minutes before eating or serving. The down time lets the oats thicken and plump up without overcooking into a sticky or compact mass.
How to Make Oat Milk
Need some tasty, creamy plant milk fast? Blend up a batch of oat milk. Unlike other plant milk bases, oats require no soaking beforehand. Simply purée 1 cup rolled oats with 3 cups water until creamy; then strain the milk through a cheesecloth-lined fine-meshed strainer or a nut milk bag. Store in the fridge for up to 3 days.
How to Make Oat Flour
Because oats are such a tender whole grain, they can be easily ground into flour with a blender or food processor. Count 1 cup of rolled oats for 1 cup of flour or 1 cup of steel-cut oats for 2 cups of flour. Add to blender or a food processor and blend until they reach a fine, flourlike texture.
How to Make Overnight Oats
“Overnight oats” is something of a misnomer: it only takes two hours for overnight oats made with rolled oats to be ready to eat. (Steel-cut oats will take longer.) But it’s a perfect way to prep your breakfast for the next morning.
Soak 1 part oats in 2 parts liquid (water or plant milk or a combination) for 2 hours or overnight. Sweeten to taste, then top with your favorite cereal add-ins. Overnight oats will keep up to three days in the fridge and get softer and thicker as time passes. Enjoy them chilled, at room temperature, or heated up in the microwave.
For more inspiration, check out these overnight oat recipes:
So Many Ways to Enjoy Oats!
Cookies, pancakes, veggie burgers, vegan queso… oats are ultra-versatile and make their way into sweet and savory dishes that can be served for breakfast, lunch, and dinner. We’ve rounded up some top ways to enjoy them: 30+ Favorite Vegan Oat Recipes (Some Will Surprise You!)
As a child, I had a lot of odd symptoms and ailments—tics, shingles, and intractable migraines. From the time I was 12 years old, I was on some sort of medication or steroid for the migraines, but nothing seemed to work. They progressively got worse.
Still, I managed to design a wonderful life for myself. I built a career, met a great man, and started a beautiful family. But shortly after the birth of our third daughter, a level of fatigue and weakness set in that I had never experienced before. I began to have bouts of severe joint pain, mysterious rashes, gastrointestinal upset, sleeplessness, and migraines so bad that I made several trips to the ER.
The Winter 2023 Issue is here!
Our gorgeous “bookazine” features expert tips, inspiration, and 81 comforting recipes for Winter.
It didn’t make sense. I was physically active, and I’d always eaten what I thought was a healthy diet. My typical breakfast was a protein smoothie, or eggs with avocado and tomato. I snacked on Greek yogurt and protein bars. Sometimes I’d eat sandwiches with “healthier” deli meats, like turkey. I ate a lot of whole foods at lunch and dinner, though I always had a lot of protein and fat at each meal.
With my symptoms worsening, I went to see a doctor, who told me it was low iron. But each symptom intensified, even after taking iron supplements.
8 Years of Searching
Over the course of eight years, I ping-ponged from specialist to specialist. Each doctor would give up on trying to find a solution and refer me out to another specialist. I received diagnosis after diagnosis: Raynaud’s syndrome, lupus, rheumatoid arthritis, and hypoactive thyroid.
After a brain scan and spinal tap, I was diagnosed with multiple sclerosis, which eventually put me in a wheelchair. I gained 40 pounds and lost vision in one eye. I had to undergo surgery for a large tumor that had coiled itself around the peroneal nerve in my left leg, and I subsequently developed complex regional pain syndrome.
I was the perfect patient: I followed all of the doctor’s orders, went to every appointment, and took every medication and supplement. I tried every fad diet I could think of, from paleo to keto, from high-fat to fasting. Still, my symptoms only became more crippling. The chronic fatigue I was trying to alleviate was compounded by the fatigue of searching for answers.
I was forced to redesign my life around feeling unwell. The worst of it all was that I was missing milestones in my children’s lives. I couldn’t give them what I saw other children being given. In agony, I watched from the couch as they grew up. It was gut-wrenching.
Another Startling Diagnosis Sparks Change
In November 2019, my husband called my primary care doctor and said, “Enough is enough. My wife can barely move and now it’s hard for her to breathe.” My doctor told my husband to take me to the hospital. It turned out I had pleurisy in my lungs, and a dangerous blood clot in my leg. Over the next couple days they ran more tests and found that I had advanced kidney disease. The nephrologist said I’d likely need a transplant in six months.
That’s when I finally said, “Enough is enough.” I knew that I needed to truly heal, not just suppress my symptoms. Two weeks later, I was discharged from the hospital, determined to put my health first—mind, body, and soul—and allow my body to do what it was designed to do.
When my neighbor, who also had CKD, shared with me The China Study and Forks Over Knives, I was immediately ready to try a whole-food, plant-based diet. For me, it was a matter of life and death. I made the switch overnight, cutting out animal products, oil, and highly processed foods.
It wasn’t easy, but I had a mama-bear mentality that helped me stay the course: I needed to be there to take care of my children. Another thing that really helped me in the first few weeks was understanding the biochemical processes that were causing my cravings for the foods I used to eat. And thank goodness for my husband! He kept me on board when I was too sick to shop and prepare meals.
Remission and Recovery
Within six weeks of going WFPB, I experienced what my nephrologist called a spontaneous remission. Some would call it a miraculous recovery. I had set out trying to avoid a kidney transplant and end-stage renal failure: I not only succeeded in restoring my kidney functioning; I also resolved virtually all the other symptoms that had been plaguing me for years. My MS no longer bothered me. The blood clot in my leg had dissolved. My migraines were gone. My joint pain receded. My energy came back. Lab work showed that my numbers were normal, as though nothing had ever been wrong. I was blown away by how quickly my body healed, as were my nephrologist, hematologist, and rheumatologist.
In remission, I was out of my wheelchair, playing with my kids, and taking care of the house again. That’s when I started to “cheat” more—eating non-WFPB foods, not sleeping enough, and reverting to some other unhealthy habits—and I had a flare-up with my MS. After that, I started to teach myself about the process of sustainable change. I realized that when I gave into temptation and ate unhealthy foods, I received instant gratification but denied myself things so much greater than the cookie in front of me: quality life with my children, riding my bike, going to the beach, date nights with my husband, to name just a few. I recommitted to eating whole-food, plant-based.
Helping Others Heal
Today I remain wheelchair-free. I play with my children, make it to their activities, and have the stamina to home-school. I am even back to work!
In light of my own profound recovery, I also switched my daughter to a WFPB diet. Suffering from severe eczema since birth, and diagnosed with chronic migraines at age 4, she had spent most of her days bedridden or getting IVIG infusions. She had so much pain and sensitivity that we couldn’t even hug her. Today, at age 12, she is back to gymnastics and sharing her vibrant personality. She actually craves whole foods and prefers them over processed foods now.
The great part is that this lifestyle doesn’t feel hard anymore. It’s just a normal part of our day-to-day lives. We usually make “mish-mash bowls,” which have a base of potatoes or brown rice, with a variety of beans and veggies. Then we tie everything together with a homemade oil-free dressing or sauce or hummus. My husband and I really like simple veggie soups in the winter (still working on getting my kids to like them). We don’t have a lot of time to cook (I know, no one does—but we really don’t) so we also do super easy meals, such as seasoned roasted potato wedges with a side of veggies and some fruit. Nothing fancy, but it’s practical and tastes good!
Since my recovery, I have made it my life’s mission to help other people who are chronically ill and desperate to heal. It’s a soul-sucking feeling when you realize that symptoms have stealthily snuck in and all of sudden you are living a new normal that you never intended. No one should have to experience this, which is why I became a certified health coach helping women with chronic kidney disease and autoimmune disease.
It was one hell of ride to get here, and my family lost a lot in those eight years when I was seriously ill. I will be forever grateful to my neighbors, who opened my eyes to a whole-food, plant-based lifestyle. It’s a liberating feeling to know that we have control of our health.
Ready to get started? Check out Forks Meal Planner, FOK’s easy weekly meal-planning tool to keep you on a healthy plant-based path. To learn more about a whole-food, plant-based diet, visit our Plant-Based Primer.
Heart disease is the leading cause of death worldwide, killing more people than all forms of cancer combined, and the American Heart Association reports nearly half of Americans have some form of cardiovascular disease. Fortunately, in the vast majority of cases, it’s possible to prevent heart disease or halt its progression by making simple diet and lifestyle changes—and Forks Over Knives has published hundreds of real-life success stories by people who have done just that. In celebration of American Heart Month, we’re highlighting some of our favorite heart-health success stories that we’ve published over the years. If you’re struggling with cardiovascular disease, high blood pressure, or high cholesterol, we hope that you’ll take heart in these inspiring accounts.
Have you experienced improvements to your health after adopting a whole-food, plant-based diet? Share your own success story here!
At just 30 years old, Yvonne McGill had high blood pressure, high cholesterol, diabetic retinopathy, and a variety of other health issues. When she discovered a WFPB diet, she was immediately willing to give it a try. “I ate whole grains, beans, and all the vegetables I could find,” writes McGill. “Within three months, I lost 20 pounds. My cholesterol stabilized, so my doctor took me off of the statin medication.”
Read More
When his sons were just toddlers, Rajiv Misquitta, MD, suffered a heart attack. A month later, he was again rushed to the ER with chest pains, and he had to undergo quintuple bypass surgery. “The best drugs and surgical procedures seem to, at best, delay the progression of heart disease,” writes Misquitta. Not content with this prognosis, he dug into research on the connections between diet and disease, reading The China Study by T. Colin Campbell, PhD. The science convinced him to adopt a WFPB diet. “I lost 25 pounds following this lifestyle change, and my LDL cholesterol went from 130 to 58,” writes Misquitta.
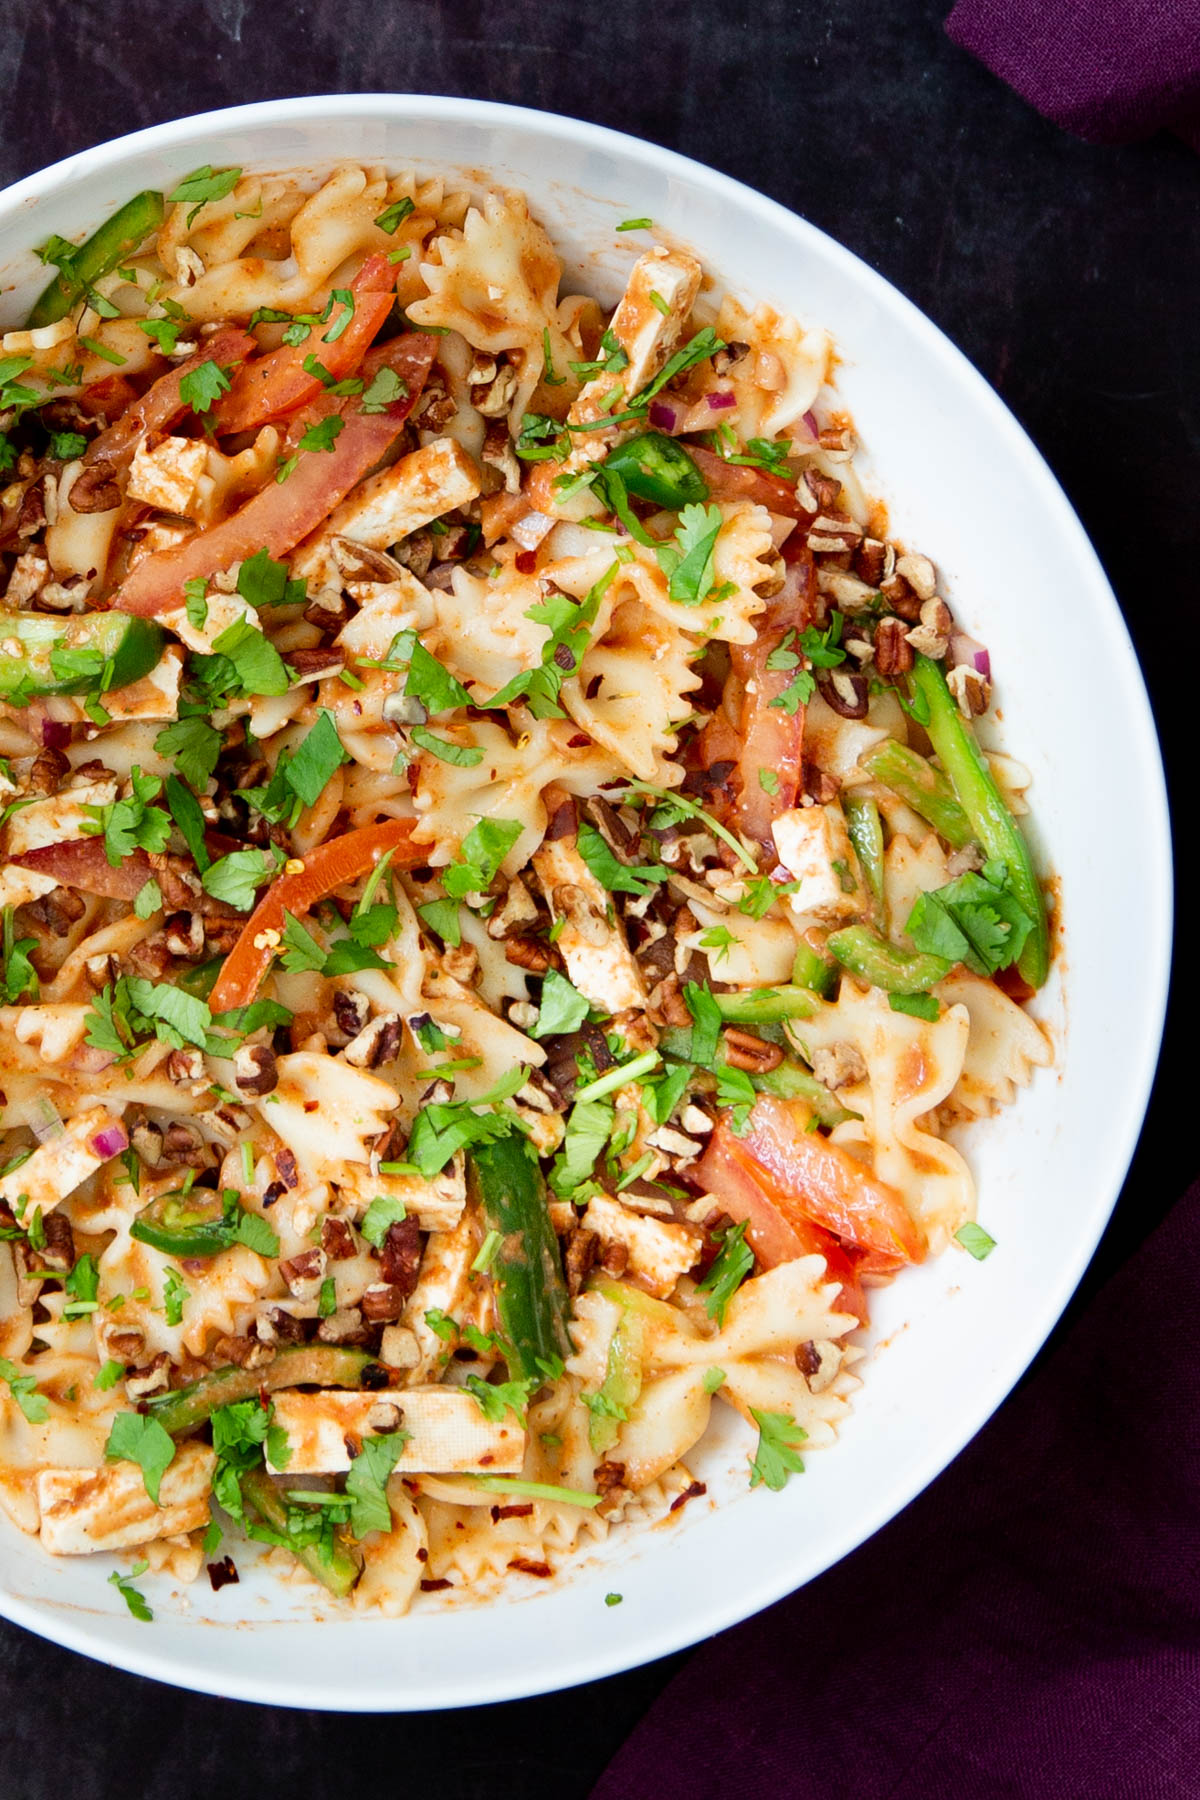
Part healthy salad, part comforting pasta, this Tikka Masala Pasta Salad recipe has everything you love about your favorite Indian sauce in one bowl. Serve fresh or make ahead for an easy vegan meal, and enjoy either warm or cold. Gluten-free, soy-free & nut-free option.
Indian food cravings are not to be taken lightly. However, when it’s simply too hot to whip up a hot and spicy tikka masala, but you are still craving all those flavors, then make this easy pasta salad tossed with a quick tikka masala dressing!
An Indian-inspired vegan pasta salad that is satisfying, quick and easy and made with simple everyday ingredients! I love how versatile pasta salad is. You can take it in so many directions.
This vegan pasta salad is great as a main or a side dish. It is bursting with slightly spicy and wonderfully aromatic Indian flavors, and features a mayo-free creamy dressing and lots of crunchy fresh veggies.
why you’ll love this tikka masala pasta salad
it comes together very quickly
it’s very flavorful
it has veggies, pasta and tofu.
it can be made gluten-free Nutfree and Soyfree
It satisfies both summer salad and saucy Indian food cravings!
Part healthy salad, part comforting pasta, this Tikka Masala Pasta Salad recipe has everything you love about your favorite Indian curry in one bowl. Serve fresh or make ahead for an easy vegan meal, and enjoy either warm or cold. Nutfree . Options for gluten-free Soyfree
Prep Time10mins
Cook Time25mins
Total Time35mins
Course: Main, Side
Cuisine: American, Indian
Keyword: Indian pasta salad, vegan pasta salad
Servings: 4
Calories: 223kcal
Author: Vegan Richa
Ingredients
For the salad:
4ounces(113.4g)farfalle or other pasta cooked according to package instructions
1large tomatothinly sliced or chopped
1/2green bell pepperthinly sliced
1/2cupred onionchopped
6 to 7ounces(170.1g)of firm or extra firm tofuchopped or made into thin slices or rectangles
3 to 4tablespoonschopped pecans or other crunchy additions such as pumpkin seeds or hemp seeds or walnuts
1/4cupchopped cilantro
For the dressing:
2.5tablespoonstomato paste
2tablespoonsnon-dairy yogurt or use non dairy cream option such as coconut cream or cashew cream or blended up tofu
3/4teaspoonKashmiri chili powder or paprikaless or more to preference
1/4teaspooncayenneomit for less heat
1/2teaspoondried fenugreek leavesor use 1/4 teaspoon ground mustard
Optional: 1/2 cup to 1/4 cup of chickpeas
Instructions
Cook the pasta according to the instructions on the package, drain and rinse in cold water and add to a bowl.
Chop up the vegetables that you plan to use then add to a bowl. Add the tofu, cilantro and the nuts or seeds and mix well.
Make the dressing:
Add all of the ingredients of the dressing into a bowl and mix really well. If the dressing is too thick add in a tablespoon or so of water and mix in. Heat it in a skillet or microwave until it just comes to a boil. Then taste and adjust salt and flavor, it will be salty but it’s going over the entire bowl so you want to keep it a bit on the salty side. Heating the dressing helps the spices bloom. Cool for a few minutes.
Add this dressing to your salad bowl, and toss well to coat. Taste and adjust salt and flavour. Add more lime juice if needed, more black pepper if needed. Top it with some more fresh cilantro, let it chill for 15 minutes or more then serve.
Notes
Yogurt substitute: use any other nondairy cream option such as coconut cream or cashew cream or blended up silken tofu
Soyfree: add in a can of chickpeas instead of tofu.
nutfree : omit the pecans and add seeds of choice, use Nutfree yogurt or non dairy cream
Gluten-free: use glutenfree pasta
Nutrition
Nutrition Facts
Vegan Tikka Masala Pasta Salad
Amount Per Serving
Calories 223Calories from Fat 72
% Daily Value*
Fat 8g12%
Saturated Fat 1g6%
Sodium 362mg16%
Potassium 330mg9%
Carbohydrates 30g10%
Fiber 3g13%
Sugar 5g6%
Protein 10g20%
Vitamin A 682IU14%
Vitamin C 22mg27%
Calcium 92mg9%
Iron 2mg11%
* Percent Daily Values are based on a 2000 calorie diet.
Ingredients:
pasta – farfalle or any other shape of pasta cooked according to package instructions
veggies: tomato, bell pepper, onion
for added protein I like to toss some firm or extra firm tofu into the salad. You can chop it or cut it into thin slices or rectangles
chopped pecans are added for some crunch. Instead if pecans you can use any other nut or seed such as pumpkin seeds or hemp seeds or walnuts
fresh chopped cilantro adds some color – feel free to use parsley if you are not a fan of cilantro
For the dressing, we blend tomato paste with non-dairy yogurt and lime juice
tikka masala spices: salt, pepper, garam masala, coriander, garlic and onion powder, Kashmiri chili powder or paprika and cayenne
dried fenugreek leaves make this taste extra authentic but you can omit this or add 1/4 teaspoon ground mustard
another optional add-in would be 1/2 cup to 1/4 cup of chickpeas or white beans
Tips & Variations:
Yogurt sub: use any other nondairy cream option such as coconut cream or cashew cream or blended up silken tofu
Soyfree: add in a can of chickpeas instead of tofu.
nutfree : omit the pecans and add seeds of choice
Glutenfree: use glutenfree pasta
How to make Vegan Tikka Masala Pasta Salad:
Cook the pasta according to the instructions on the package, drain and wash in cold water and add to a bowl.
Chop up the vegetables that you plan to use then add to a bowl. Add the tofu, cilantro and the nuts or seeds and mix well.
Make the dressing:
Add all of the ingredients of the dressing into a bowl and mix really well.
If the dressing is too thick add in a tablespoon or so of water and mix in. Heat it in a skillet or microwave until it just comes to a boil. Then taste and adjust salt and flavor, it will be salty but it’s going over the entire bowl so you want to keep it slightly salty. Heating the dressing helps the spices bloom. Cool for a few mins
Add this dressing to your salad bowl, and toss well to coat. Taste and adjust salt and flavour. Add more lime juice if needed, more black pepper if needed.
Top it with some fresh cilantro, let it chill for 15 minutes or more then serve.
Storage:
For best results, keep your leftover pasta salad in a sealed airtight container. As a rule, pasta salad lasts for about 3-4 days when properly stored.
Lovers of French Onion Soup will LOVE this Vegan French Onion Dip – aka the vegan dip to beat all vegan dips! Caramelized onions mixed with a tofu base make for delectable caramelized onion dip for parties and gameday!
Here’s the vegan party snack to beat all party snacks! Vegan French Onion Dip – lovers of my vegan French Onion Soup will LOVE this dip made with homemade caramelized onions.
Now, caramelizing onions can be incredibly tedious and requires watching the pan for half an hour. In this Instant Pot French Onion Dip recipe, the caramelization part is completely hands-off! We let the onions slowly caramelize in your Instant Pot. And the best thing – there’s zero risk of burnt onions in the end. You can make the caramelized onion on stove top or bake them. See recipe notes for instructions.
This restaurant-style dip pairs perfectly with fresh veggie sticks, breadsticks, or your favorite homemade or store-bought crackers for easy entertaining.
Using my fool-proof method, the onions will cook at low heat and caramelize and get perfectly jammy and delicious! If you love how these turn out and want to use these for more recipes than just French Onion Dip, you can use these over hummus/ avodado toast or cream cheese toasts, add them to top your favorite pasta, etc.
French onion dips usually require cream cheese and/or yogurt as a base. In this vegan version, we blitz silken tofy with dairy-free yogurt.
Lovers of French Onion Soup will LOVE this Vegan French Onion Dip – aka the vegan dip to beat all vegan dips! Caramelized onions mixed with a tofu base make for delectable caramelized onion dip for parties and gameday!
Prep Time15mins
Cook Time1hr15mins
Total Time1hr30mins
Course: Appetizer, Snack
Cuisine: French
Keyword: French onion dip
Servings: 4
Calories: 90kcal
Author: Vegan Richa
Ingredients
For the caramelized onions:
1large yellow onion,thinly sliced
2clovesof garlic, minced
1/4teaspoonsalt
1/2teaspoonsugar
1/2teaspoondried thyme
2bay leaves
1/4teaspoonblack pepper
1tablespoonvegan butteror use oil
1teaspoonbalsamic vinegar
For the cream dip:
3ozfirm tofu
1/2cup(125g)non-dairy yogurt
1/2teaspoongarlic powder
1/2teaspoononion powder
1/2teaspoonsalt
1/8teaspoonblack pepper
1tablespoonnutritional yeast or use 1 teaspoon yellow miso
2teaspoonsvegan Worcestershire sauce
2-3tablespoonsof the caramelized onions
green onion, pepper flakes for garnish
Instructions
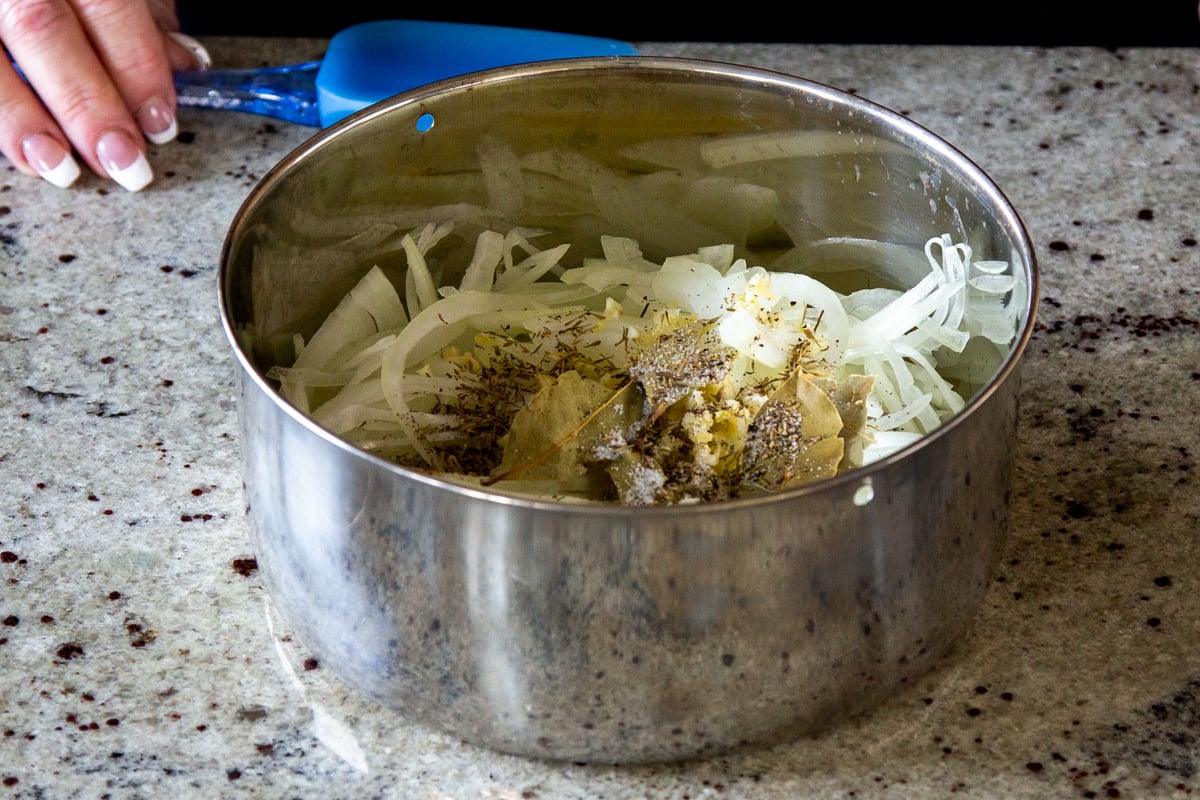
Make the caramelized onion in the Instant pot: (see recipe notes for stovetop instructions). Add 3 cups of water to your inner pot then use a large flat insert and add the onion. Keep them less than two layers thick otherwise the onions won’t caramelize. Add the rest of the ingredients and toss to coat the onions really well. If some onions are still dry add some more vegan melted butter. Close the inner pan with either foil or the lid that comes with it.
Then use a trivet and lower it into the inner pot. Close the instant pot lid and pressure cook for 1 hour. Let the pressure release naturally for 10 minutes then quick release. Open the lid and check on the onions. They should be cooked and somewhat caramelized. Remove the pan and the trivet . The onions should have caramelized. If there’s a lot of moisture, transfer to a skillet to cook for 2-3 mins to evaporate a bit.
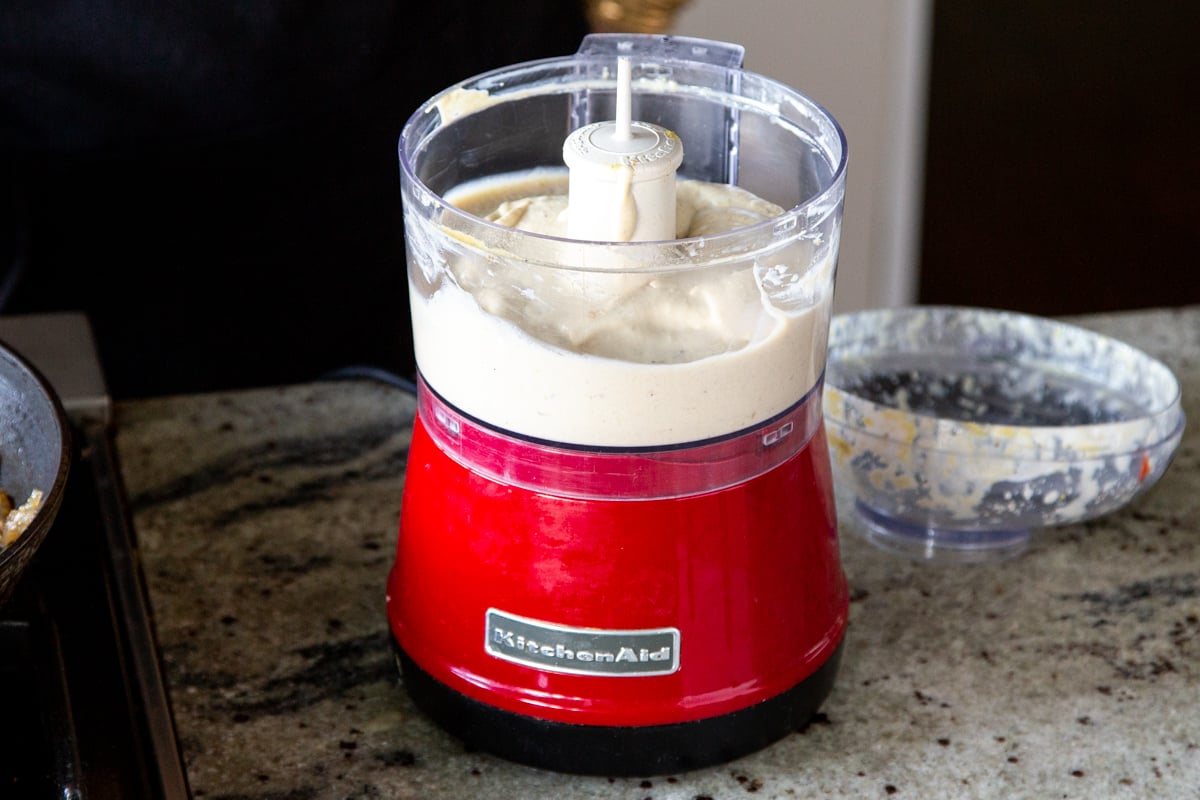
To make the cream dip, add the tofu, yogurt, 2-3 tablespoons of caramelized onions, garlic and onion powder, salt and pepper, nutritional yeast, and Worcestershire sauce to a food processor and process until the mixture is smooth. Taste and adjust salt and flavor.
Adjust more tang by adding a little bit of lime juice and process again. Transfer to a serving bowl and top with the remaining caramelized onions (swirl some of the onions into the dip). Top with pepper flakes and green onions and serve with crackers, toasted bread, veggies, etc.
Notes
To make this dip soy-free, use 3/4 cup of soaked cashews. Or you can use more of the yogurt (about 3/4 cup) plus 2-3 tablespoons of soaked seeds such as hemp seeds or pumpkin seeds. Process and use. Omit the Worcestershire sauce To make the caramelized onion on Stovetop:Add onion, salt, sugar, vegan butter to a skillet and cook over medium heat for 14-16 mins. Stir occasionally and deglaze with splashes of broth if needed. Add the rest of the ingredients and continue to cook, stirring occasionally until the onion are caramelized to preference. (10-25 mins). If they keep drying out quickly, partially cover the pan and continue. Stir well occasionally to avoid burning and even cooking. To make the caramelized onions in a baking dish: Add all the ingredients under onion in a greased baking dish and spread. Use a dish that fits the onions so they don’t have too much space between them. Cover with parchment and bake at 385 deg F for 35-50 mins. Stir once in between. Add splashes of broth if drying out too much
Nutrition
Nutrition Facts
French Onion Dip
Amount Per Serving
Calories 90Calories from Fat 36
% Daily Value*
Fat 4g6%
Saturated Fat 1g6%
Sodium 663mg29%
Potassium 103mg3%
Carbohydrates 10g3%
Fiber 1g4%
Sugar 4g4%
Protein 4g8%
Vitamin A 149IU3%
Vitamin C 7mg8%
Calcium 86mg9%
Iron 1mg6%
* Percent Daily Values are based on a 2000 calorie diet.
Ingredients:
for the caramelized onions, I use yellow onions to keep the color nice and golden
we season the onions with garlic, thyme, leaves, and pepper
balsamic vinegar and sugar provide the perfect mixture of sweetness and tanginess
the onions slowly caramelize in vegan butter
For the cream dip we blend tofu with non-dairy yogurt
for that savory-cheesy flavor we add a mix of garlic powder, onion powder, Worcestershire sauce, and nutritional yeast or miso
Tips:
To make this dip soy-free, use 3/4 cup of soaked cashews. or use more of the yogurt (about 3/4 cup) plus 2-3 tablespoons of soaked seeds such as hemp seeds or pumpkin seeds. Process and use. Omit the Worcestershire sauce.
For extra tanginess and extra creaminess, you can add some vegan cream cheese to this dip
How to make Vegan French Onion Dip:
Add 3 cups of water to your inner pot then use a large flat insert and add the yellow onion. You don’t want it to be more than two layers thick otherwise the onions won’t caramelize.
Add the rest of the ingredients and toss to coat the onions really well.
If some onions are still dry add some more vegan melted butter. Close the inner pan with either foil or the lid that comes with it.
Then use a trivet and lower it into the inner pot. Close the instant pot lid and pressure cook for one hour. Let the pressure release naturally for 10 minutes then quick release.
Open the lid and check on the onions. They should be cooked and somewhat caramelized. Remove the pan and the trivet. The onions should have caramelized.
If there’s a lot of moisture, transfer to a skillet to cook for 2-3 mins to evaporate a bit.
To make the cream dip, add the tofu, yogurt, 2-3 tablespoons of caramelized onions, garlic and onion powder, salt and pepper, nutritional yeast, and Worcestershire sauce to a food processor and process until the mixture is smooth. Taste and adjust salt and flavor.
Add more tang by adding a little bit of lime juice and process again. Transfer to a serving bowl and top with the caramelized onions (swirl some of the onions into the dip).
Top with pepper flakes and green onions and serve with crackers, toasted bread, veggies, etc.
To make the caramelized onion on Stovetop:
Add onion, salt, sugar, vegan butter to a skillet and cook over medium heat for 14-16 mins. Stir occasionally and deglaze with splashes of broth if needed. Add the rest of the ingredients and continue to cook, stirring occasionally until the onion are caramelized to preference. (10-25 mins). If they keep drying out quickly, partially cover the pan and continue. Stir well occasionally to avoid burning and even cooking.
To make the caramelized onions in a baking dish: Add all the ingredients under onion in a greased baking dish and spread. Use a dish that fits the onions so they don’t have too much space between them. Cover with parchment and bake at 385 deg F for 35-50 mins. Stir once in between. Add splashes of broth if drying out too much
Storage
Store in a closed container in the fridge for upto 4 days.
Chataka Dal is a spicy flavorful Dal from the Indian state of Maharashtra. It is made from yellow split pigeon peas simmered along with tomatoes, then seasoned with a spicy chili tempering. Gluten-free, soy free and nut free.
This Chataka dal is another dish I love – it’s a simple dal with few ingredients but trust me, it’s far from simple in taste. It’s fiery with the added chili powder tempering. As always, you can adjust the spice level to your preference.
To serve, I serve with flatbread or rice. This dish goes incredibly well with rice but you could also serve this with cauliflower rice.
Dals are soul food with many variations from various states and regions in India. There are several types of Dals and legumes used in Indian cuisine. You can see a list with pictures here. This Chataka dal is quick and delicious. Traditionally it used 1-2 tablespoon of the Indian chili powder, but that is doing to be a lot of heat. So I use less. You can use whichever lentils or split peas you have for this recipe. Just cook them long enough until tender and then add the tempering/Tadka.
Chataka Dal is a spicy flavorful Dal from the Indian state of Maharashtra. It is made from yellow split pigeon peas simmered along with tomatoes, then seasoned with a spicy chili tempering. Gluten-free, soy free and nut free.
Cook Time1hr35mins
Total Time1hr35mins
Course: Main, Side
Cuisine: Indian
Keyword: chataka dal, dal recipes
Servings: 4
Calories: 127kcal
Author: Vegan Richa
Ingredients
3/4cup(126g)toor dal (split pigeon peas)You can also use chana dal (split skinned brown chickpeas) or Moong dal (split mung beans)
1teaspooncayenne or use 1/2 teaspoon cayenne and 1/2 teaspoon paprika
Lemon juice and cilantro for garnish
Instructions
Cook the split peas or lentils: wash the lentils/dal and soak in hot water for 10 minutes then drain and add to a sauce pan. Add the rest of the ingredients and mix. Cook over medium heat, partially covered. Depending on the dal it will take anywhere between 35 to 55 minutes.
If using chana dal, use a pressure cooker and pressure cook 18-20 minutes. It might take up to 2 hours in a saucepan if the dal is too old.
To pressure cook the dal, use only 2 cups of water and add the rest of the ingredients with the washed and drained dal to an instant pot or pressure cooker and pressure cook for 10 minutes for the split pigeon pea / toor dar, 6 minutes for moong dal and 18 minutes for chana dal. Let the pressure release naturally for 10 mins then quick release, then open the lid.
Make the tempering. Add oil to a skillet over medium high heat. Once the oil is hot, you can check the oil by putting 1 or 2 mustard seeds and see if they start to change colour immediately. If they don’t then let the oil get hot for another minute or 2. If they pop out immediately, the oil is a bit too hot, reduce heat a bit and continue.
Add the mustard seeds to the hot oil and cook until either the mustard seeds pop or change color and lighten significantly. Then add the cumin seeds and mix well for a few seconds. Then reduce the heat to medium and add the curry leaves, asafoetida and mix in for another few seconds. Then add garlic carefully and mix in really well.
If you’re using an electric stove, take pan off the stove because the electric stove takes longer to reduce the heat. Also add in 1 more teaspoon of oil if pan is overheated.
As soon as the garlic is starting to turn golden, mix really well then add in the Kashmiri chili powder, cayenne and mix in. Take the pan off heat.
Drop this tadka/tempering into the dal. I usually put the dal into a serving container before adding the tadka so that tempering can be swirled in and not mixed in completely.
If your tempering doesn’t have enough oil then you can add in a few splashes of water to get all of the tempering and pour this hot tempering all over the cooked dal. Swirl it in.
Garnish with lemon juice and cilantro and serve immediately, with flatbread or rice. This Chataka dal goes incredibly well with rice.
Notes
It’s a spicy dal, to reduce the heat you can reduce the cayenne and the Kashmiri chili powder.
No Garlic: omit the garlic and add a pinch more asafetida and 1/2 teaspoons dried fenugreek leaves
Nutrition
Nutrition Facts
Chataka Dal Spicy Maharashtrian Toor Dal
Amount Per Serving
Calories 127Calories from Fat 27
% Daily Value*
Fat 3g5%
Saturated Fat 0.2g1%
Sodium 337mg15%
Potassium 117mg3%
Carbohydrates 20g7%
Fiber 5g21%
Sugar 2g2%
Protein 7g14%
Vitamin A 589IU12%
Vitamin C 66mg80%
Calcium 52mg5%
Iron 1mg6%
* Percent Daily Values are based on a 2000 calorie diet.
Ingredients:
this dal is made with split pigeon peas. You can also use chana dal
1 tomato, chopped small
For the tadka/tempering we heat oil and add mustard seeds, cumin seeds, asafoetida, and curry leaves
garlic, finely chopped
ground spices: turmeric and chili powder, cayenne
chopped cilantro and lemon juice
Tips:
It’s a spicy dal, to reduce the heat you can reduce the cayenne and the Kashmiri chili powder.
Its gluten free, soy free and nut free.
How to make Chataka Dal:
Cook the split peas or lentils: wash the lentils/dal and soak in hot water for 10 minutes then drain and add to a sauce pan. Add the rest of the ingredients and mix, cook over medium heat, partially covered.
Depending on the dal it will take anywhere between 35 to 55 minutes.
To pressure cook the dal, use only 2 cups of water and add the rest of the ingredients with the washed and drained dal to an instant pot or pressure cooker and pressure cook for 10 minutes for the split pigeon pea / toor dar, 6 minutes for moong dal and 18 minutes for chana dal. Let the pressure release naturally then open the lid.
Make the tempering. Add oil to a skillet over medium-high heat. Once the oil is hot, you can check the oil by putting 1 or 2 mustard seeds and see if they start to change color immediately.
Then add the mustard seeds to the hot oil and cook until either the mustard seeds pop or change color and lighten significantly. Then add the cumin seeds and mix well for a few seconds.
Then reduce the heat to medium and add the curry leaves, asafoetida, and mix in for another few seconds. Then add garlic carefully and mix in really well.
If you’re using an electric stove, take the pan off the stove because the electric stove takes longer to reduce the heat and will tend to burn the garlic. Also, add in 1 more teaspoon of oil if the pan is overheated. As soon as the garlic is starting to turn golden, mix really well then add in the Kashmiri chili powder, and cayenne and mix in. Take the pan off the heat.
Drop this tadka/tempering into the dal. I usually put the dal into a serving container before adding the tadka so that the tempering doesn’t completely mix in.
If your tadka doesn’t have enough oil then you can add in a few splashes of water to get all of the tempering and pour this hot tempering all over the cooked dal.
How to serve Chataka Dal
Garnish with lemon juice and cilantro and serve hot with roti, flatbread or rice. It goes well with rice.
Chataka Dal is a spicy dal. To reduce the heat of this dish, you can reduce the cayenne and the Kashmiri chili powder.
Traditional recipe would need to add 1 tablespoon of the chili powder, but that is doing to be a lot of heat. So I use less. On the side you can serve some poriyal, jackfruit bhaji , Zunka, crispy potatoes or some eggplant and potatoes. It’s gluten free, soy free and nut free.
Take a big breath in—pause for a moment—and now slowly let it out. While most of your breathing is automatic, learning how to consciously work with these two diametric movements (like you just did) can unlock major benefits for your physical, mental, and emotional health. From calming anxiety to relieving sleep apnea, we talked to breathwork experts about the subtle alchemy of “belly breathing,” why we’ve forgotten the power of this simple practice, and how you can easily incorporate breathwork into your busy life.
Struggling to cook healthy meals at home?
Forks Meal Planner is here to help.
IN THIS ARTICLE YOU’LL FIND:
A QUICK ANATOMY LESSON: HOW THE BREATH WORKS
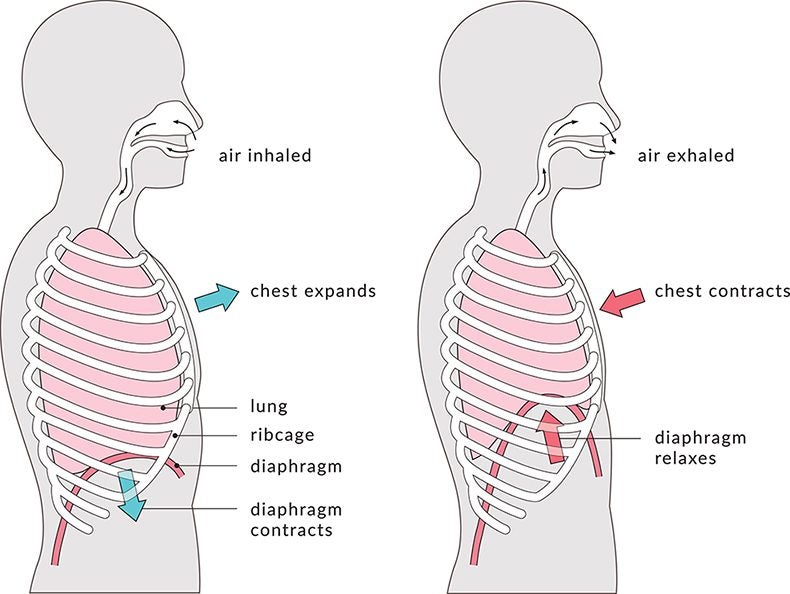
Before getting started, it’s important to understand the basics of your respiratory system. At the base of your ribcage is a dome-shaped muscle called the diaphragm—this is the most essential part of the body to befriend if you’re committed to improving your breathing habits. As you inhale, the diaphragm contracts and allows the lungs to expand as you take in air. When you exhale, it rebounds to its natural shape as the lungs contract and push air out of the body. Intentionally breathing into the diaphragm strengthens this essential muscle and over time allows you to consistently take fuller, more nourishing breaths.
But the diaphragm isn’t the only important muscle involved in breathing. Between each rib bone are intercostal muscles that help expand and shrink the chest cavity with every cycle of breath. As you learn more effective breathing techniques, you strengthen these muscles. Instead of feeling like your breath is a simple up-and-down motion of your lungs, you’ll be able to feel the full 360-degree expansion of your rib cage.
As you bring air into your lungs through your nose or mouth (although you’ll learn below why nasal breathing is better than mouth breathing), oxygen is diffused into the bloodstream and carried to your cells. This supply of oxygen, combined with the sugars from the food you eat, allow your cells to produce energy and function at optimal levels. Carbon dioxide, a byproduct of the energy conversion in your cells, is then transported back into your lungs and expelled when you exhale. These two processes—inhaling oxygen and exhaling carbon dioxide—are automatic functions of the respiratory system, but learning how to breathe more consciously can significantly improve the functioning of your body and mind.
HOW YOUR CURRENT BREATHING TECHNIQUE COULD BE HURTING YOUR HEALTH
It’s easy to think you’re breathing correctly when the majority of it happens unconsciously. But it turns out a healthy breath actually requires a decent amount of thought.
James Nestor, journalist and best-selling author of Breath: The New Science of a Lost Art, traveled the world to discover exactly where we lost the ability to breathe properly—and how to relearn this crucial skill.
“A lot of us assume we’re breathing just fine because we’re alive,” says Nestor. “But just being alive is a lot different from being healthy. Working with researchers at Stanford I learned that the majority of the population suffers from some sort of chronic respiratory illness—be that chronic sinusitis, snoring, sleep apnea, asthma, or COPD. And these are growing every year to where it’s reaching epidemic levels across the world.”
Air pollution, exposure to cigarette smoke, and airborne diseases are major factors in the increased rates of respiratory illness, but there’s also a lesser known culprit behind these skyrocketing ailments: mouth breathing. While it’s certainly fine to breathe through your mouth when you have a stuffy nose or during a specific breathwork practice, it’s not effective—and can even be damaging—when it’s your default setting.
“Our nose serves enumerable functions,” Nestor explains. Nasal breathing releases nitric oxide, which widens blood vessels and allows more oxygen to reach the body’s tissues. Nestor notes that nasal breathing also filters and moistens air as it enters the body, along with promoting relaxation by engaging the parasympathetic nervous system. “We don’t get any of those advantages when we breathe through our mouth.”
Breathing through your mouth not only circumvents the beneficial functions that are naturally built into your nose but it also dehydrates your body quicker and leads to higher rates of periodontal disease and cavities.
Apart from mouth breathing, most people shortchange the health benefits of the breath by not fully using the diaphragm to inflate the belly and create more room for the lungs to expand. Valentina Jaramillo, a San Diego-based breathwork practitioner and co-founder of Rise In Love, facilitates workshops based on the ancient Tantric principles of working with the breath to improve mental, emotional, and physical health.
“We tend to breathe by just expanding our thoracic rib cage and not by expanding the belly,” Jaramillo explains. “I think in the Western world we don’t like the belly. We tend to suck it in, especially for women. But constantly contracting your belly doesn’t allow your lungs to inflate or expand as much as they should. And if we aren’t getting enough oxygen it’s harder for our muscles to create energy, for our heart to pump blood to our limbs, and for our digestive system to work correctly. A breathwork practice allows our bodies to have the oxygen we actually need for all our biochemical processes to function well.”
Sucking in your stomach doesn’t only impact the quality of your breath—it can lead to serious physical ailments such as organ prolapse, pelvic floor issues, asthma attacks, and chronic headaches because the abdominal muscles aren’t ever allowed to relax. This pattern of shallow breathing can also impact your mental and emotional health by keeping your nervous system in a constantly elevated state of fight-or-flight.
“When we’re stressed our breathing gets very short, we breathe too much, and we trigger stress hormones like cortisol that prepare us for danger,” Nestor says, “which, evolutionarily speaking, is a good thing—but in the 21st century we’re constantly having this reaction throughout the day when things aren’t actually dangerous. For example, you open up your email and you’re stressed out about what your boss wrote to you. This constant state of stress sends our body the wrong signals.”
WHERE DID OUR BREATHING GO WRONG?
So how did we get to this point where our breath is constricted, shallow, and pushed primarily through the mouth? Alan Dolan, a breathwork practitioner with more than 17 years of experience leading breath-coach trainings at his retreat center in Lanzarote, Spain, has an idea.
“I think one of the reasons we forgot [how to breathe properly] is due to the Industrial Age where we moved from an agrarian connection to nature into the Industrial Revolution where science and technology became king,” he explains. “We lost our connection to the natural world and forgot that nature is an incredible teacher.”
Nestor’s research backs up this claim by shining a light on how breathwork was—and still is—a critical part of many cultures that emphasize a more holistic approach to health.
“If you look at qi gong, ancient Hindu cultures, and Chinese scriptures they’ve emphasized the importance of the breath for thousands of years,” Nestor says. “Many of the incredible claims these cultures make about the breath are now verified through science. Yes, you can heat your body up through breath, you can straighten a scoliotic spine, you can vastly reduce anxiety, you can relieve snoring and sleep apnea—all through the way in which you breathe. So it’s not news to anyone, but I suspect most people think that something so subtle and obvious couldn’t have such a huge impact.”
The good news is that both Dolan and Nestor are noticing an increased desire in the West to learn how to breathe for better health and apply these ancient practices to modern life. “We’ve just had a global pandemic that’s robbed us of the ability to breathe,” says Nestor. “People are now thinking that it might be important in their day-to-day life.”
THE ‘IDEAL’ BREATH
We asked Nestor, Dolan, and Jaramillo if there was an ideal way to breathe, and all three answered with the same technique—diaphragmatic breathing.
“I just call it healthy breathing or ‘human’ breathing,” Nestor says. “Because it’s how we’ve been designed to breathe. All you have to do is look at nature as your guide. Look at a healthy infant breathing. Look at your dog breathing when it’s sleeping. You can see they have healthy diaphragmatic motion.”
Diaphragmatic breath (also called belly breathing) involves deeply inhaling into the stomach area like you’re inflating a balloon and allowing the breath to travel into the upper chest. If you rest your hand on your belly you can feel each breath push gently into your palm. The exhale simply deflates that interior “balloon” so you can feel your rib cage and stomach lightly contract back to their resting state. But remember, it’s not just about moving your diaphragm: It’s also crucial to take your inhales and exhales through the nose to reap the benefits of your olfactory filters.
“Diaphragmatic breathing gives the nervous system the rest-and-digest message as opposed to the fight-or-flight response that happens when we breathe into the upper chest,” explains Dolan. “So if we’re breathing solely in the upper chest, we’re constantly telling our nervous system that we’re in danger.”
Consistency is also key when you start to work with this breathing technique. Similar to the way that eating vegetables won’t improve your health much if you continue to consume large amounts of highly processed junk food, practicing diaphragmatic breathing only once a week won’t make a big difference. Jaramillo recommends doing short bursts throughout the day, perhaps 10 minutes after waking up and 10 minutes before bed, to get your body used to this new pattern. Eventually you can practice it during your morning commute, while you sit at your desk at work, and even when you exercise. Over time, diaphragmatic breathing will become your default setting—just as nature intended.
THE BENEFITS OF BREATHING BETTER
From increased mental clarity to stronger muscles, the benefits of taking slower, deeper breaths can have profound impacts on your health. Take a look at some of the top changes you can expect as you invite a consistent breathwork practice into your daily routine.
PHYSICAL
As our experts have explained, diaphragmatic nasal breathing helps thoroughly oxygenate the body so that your cells, organs, and muscles can work at optimal levels. At the same time it helps keep negative cellular responses—like chronic inflammation—at bay.
“When you’re breathing shallowly and in a state of heightened stress you get an inflammatory response throughout the body,” Nestor explains. “Your adrenaline kicks in, your blood sugar goes up, and your body inflames to cut off blood flow to less-critical areas when you’re in crisis mode. Having that constant state of stress throughout the day will wear your body down.”
Nestor says that learning to effectively work with your breath can reduce chronic inflammation, which is linked to sleep apnea, arthritis, Type 2 diabetes, and other autoimmune disorders. A 2016 study published in BMC Complementary Medicine and Therapies tested subjects for inflammatory biomarkers in their saliva before and after performing yogic breathing exercises. Compared with the control group, the yogic-breathing group saw significant reductions in inflammatory biomarkers, suggesting that conscious breathing techniques could play a significant role in reducing the negative physiological effects of inflammation and stress.
“Beyond just getting air into the body and expelling carbon dioxide, the diaphragm is actually a pump for our blood and our lymph system,” Nestor adds. “We need that constant movement in order for our bodies to operate normally. Constantly breathing through your mouth will impact these internal systems because you aren’t getting that fluidity of diaphragmatic motion.” The lymphatic system is part of your immune system that helps protect against bacteria, viruses, and parasites. As your body becomes more familiar with diaphragmatic breathing and turns it into muscle memory, you may experience less frequent colds or less severe cold symptoms.
Chronic respiratory ailments, such as asthma and sleep apnea, may also be relieved through diaphragmatic and nasal breathing. A 2003 study from the European Respiratory Journal measured the impact of nasal and oral breathing on the restriction of upper airway passages that lead to obstructive sleep apnea. Researchers found that airway resistance and disruptive sleep patterns were significantly lower for participants who breathed through their nose during sleep than those who breathed through their mouth. A 2014 review published in Breathe examined multiple studies and concluded that breathwork training improved the symptoms, overall health, and psychological well-being of people with asthma.
Apart from alleviating chronic ailments, learning how to breathe more effectively also has benefits for athletic performance. A 2019 article published in EC Pulmonology and Respiratory Medicine reviewed multiple studies on the physiological impact of nasal breathing and concluded that athletes can see significant changes in their performance, recovery time, and pre-game sleep quality if they breathe through their nose instead of their mouth. Nasal breathing produces higher levels of nitric oxide (which is essential in bringing oxygen to your cells) and allows for increased aerobic capacity, fewer instances of exercise-induced asthma, and improved homeostasis of heart rate and blood pressure.
MENTAL AND EMOTIONAL
Apart from giving your body a major boost, learning how to breathe better can take a lot of pressure off your mind.
“Our culture is very intellectual,” Dolan says. “Which means we put a lot of emphasis on our minds. So our brains tend to be overstimulated, which isn’t great because if there’s too much energy up top, there’s a lack of energy down in the body. When you breathe diaphragmatically, it balances that out. You drop more into the body, feel more grounded, and are more connected to the physical aspect of who you are.”
A 2017 study published in Frontiers in Psychology found that diaphragmatic breathing significantly increased the amount of time participants could stay focused on tasks that required sustained attention. Compared with a control group that received no breathwork training, participants who were provided with instructions on diaphragmatic breathing consistently exhibited lower levels of cortisol (the stress hormone) and reported fewer negative thoughts.
The connection between mental health and breath was further explored in a 2020 study published in Frontiers in Psychiatry where college students were taught SKY breathing—an advanced yogic breathwork technique—to mitigate stress and depression. Students were divided into either a control group, the SKY group, or two other mindfulness-based training groups that did not include breathwork. The researchers found that students who received the 30 hours of SKY training over eight weeks experienced a significant decrease in stress and depression and an increase in positive emotions and social connectedness.
A main part of Dolan’s job as a breathwork practitioner and trainer is to help his clients learn to breathe through their emotions. He compares this process to surfing: There will always be waves in the ocean (i.e., strong emotions to process) but if you know how to surf (i.e., use your breath) then you won’t fall into the water. As you become more adept at breathing through big emotional surges, you’ll likely start to notice that your body doesn’t internalize stress as much, allowing you to navigate difficult situations more safely and calmly.
HOW TO START A BREATHING PRACTICE (PLUS 4 TECHNIQUES TO TRY)
First things first: Don’t expect to go from zero to 100 in a single day. All the experts we spoke with emphasized that it’s important to start small when beginning to consciously work with your breath. Taking baby steps will help avoid burnout and will encourage your body to absorb this new technique as muscle memory and help build a stable habit. Start with picking one of these techniques and doing it for several minutes a day, then gradually increasing the duration or the number of times during the day that you engage with it. Try to be conscious of any changes you experience in your physical body, emotions, and mental energy: Being aware of these subtle shifts will help reinforce the healing benefits of this work.
BASIC BELLY BREATHING
If you’re brand-new to breathwork, this is the technique to start with. More advanced practices build on the foundational knowledge you’ll gain once you master basic belly breathing.
Start in a comfortable seated position or lying flat on your back. Place one hand on your belly and one hand on your chest so you can feel the breath move up and down your torso.
Inhale through your nose and inflate your belly like a balloon, feeling it gently press into your hand. Continue to draw your breath up into your chest and heart.
Slowly exhale through your nose and feel your chest, rib cage, and belly deflate as they move back to a resting position.
If you frequently struggle with anxiety, focus on making your exhales longer than your inhales. For example, if you inhale to a count of four, try exhaling to a count of six or seven. Longer exhales help engage the rest-and-digest response of your nervous system.
SQUARE BREATHING, AKA BOX BREATHING
This technique is great for strengthening the diaphragm and calming a busy mind. It does involve suspending your breath after each inhale and exhale, so be aware of whether holding your breath is emotionally triggering or physically taxing.
Start in a comfortable seated position or lying flat on your back. Place one hand on your belly and one hand on your chest so you can feel the breath move up and down your torso.
Slowly breathe in through your nose and count to four. Feel your belly gently expand and the breath rise into your chest.
Hold your breath at the top of your inhale for four seconds, noticing if you can soften the muscles in your face and chest as you do so. This should not feel strained—it should simply be a pause.
Slowly exhale through your mouth for four seconds and feel your torso relax.
Hold your breath at the bottom of your exhale for four seconds while your lungs are empty.
Repeat this pattern as many times as feels comfortable.
A common breathwork practice (or pranayama in Sanskrit) used in yoga, alternate nostril breathing brings balance to the right and left sides of the body. It’s also known to provide mental clarity, purify negative emotions, and bring a sense of calm when practiced regularly. (Note: This practice is not recommended if you have a stuffy nose because you won’t be able to take in full, deep breaths.)
Start in a comfortable seated position.
Fold your index and middle fingers to meet the fleshy base of your thumb, keeping your thumb, ring finger, and pinky straight. Bring the tip of your thumb to your right nostril and your pinky/ring finger to your left nostril.
Use your thumb to gently close the right nostril, lift the pinky/ring finger off the left nostril so it remains open, and inhale through your left nostril, breathing deeply into your belly.
Pause at the top for a moment while you press pinky/ring finger into your left nostril to close it and lift your thumb to open the right nostril. Gently exhale through the right nostril.
For your next breath, inhale through the right nostril with the left nostril still closed. Pause at the top for a moment while you press your thumb to close the right nostril, lift fingers off the left nostril, and gently exhale out of your left nostril.
Continue to repeat this pattern of breathing through alternate nostrils until you feel your body and/or mind start to relax.
COOLING BREATH (SITALI PRANAYAMA)
Feeling a little hotheaded? This yogic breathing technique is great for cooling down the mind and body when you feel agitated. While it might feel a little silly at first, you’ll quickly be able to see how it can help regulate an activated nervous system.
Find a comfortable seated position.
Roll the sides of your tongue into a tube shape and stick the tip of your tongue out between pursed lips. If you can’t roll your tongue, just purse your lips to make a small “o” shape.
Inhale slowly into your mouth by drawing air through the tube formed by your tongue (like you are drinking through a straw). Feel your breath expand throughout your torso.
Pull your tongue back inside, close your mouth, and exhale gently through your nose.
Repeat this process as many times as feels comfortable. With practice, it should bring a cooling sensation to your body and also help quiet disruptive thoughts.
Whether you’re brand-new to breathwork or have been working consciously with the breath for decades, there’s always something new you can learn from taking a few moments to be present with your inhales and exhales.
“Breathing is not complicated,” Nestor reminds us. “Look to nature as your guide. We’ve known how to do this for millions of years. We’ve just forgotten how to do it. Your body can remember—it just needs a little coaxing.”


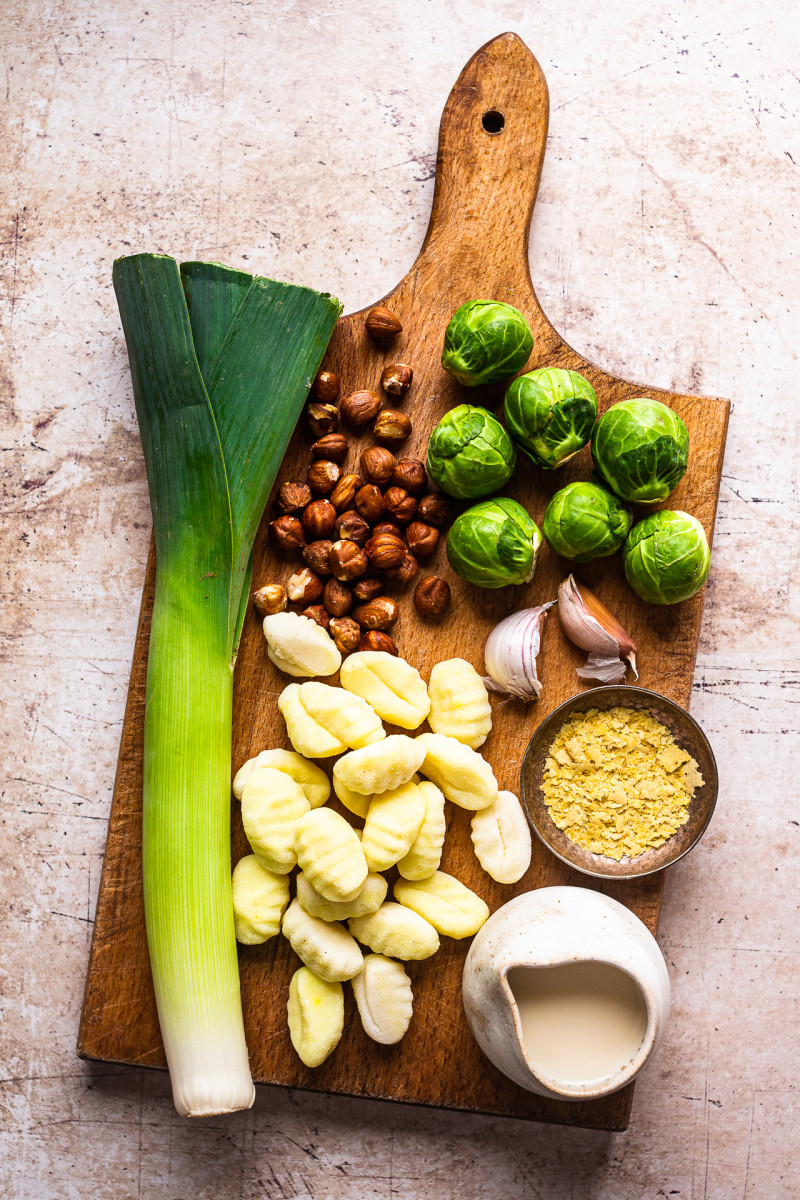
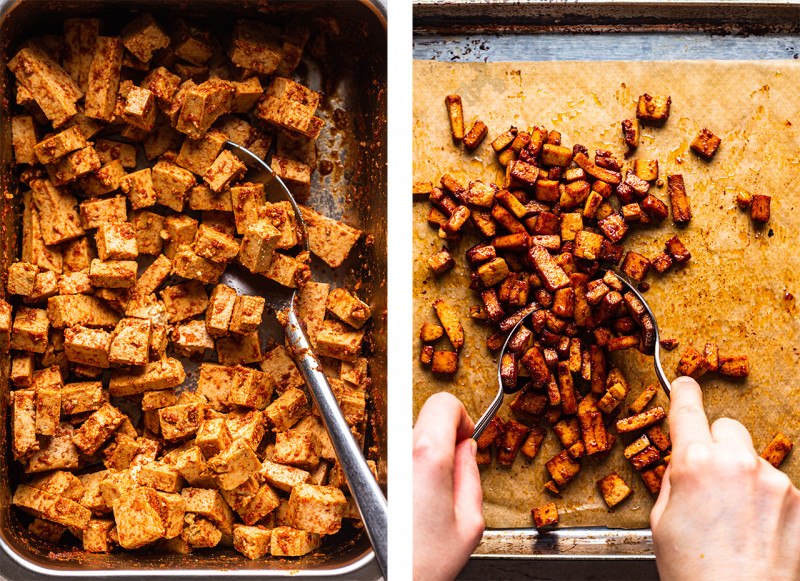
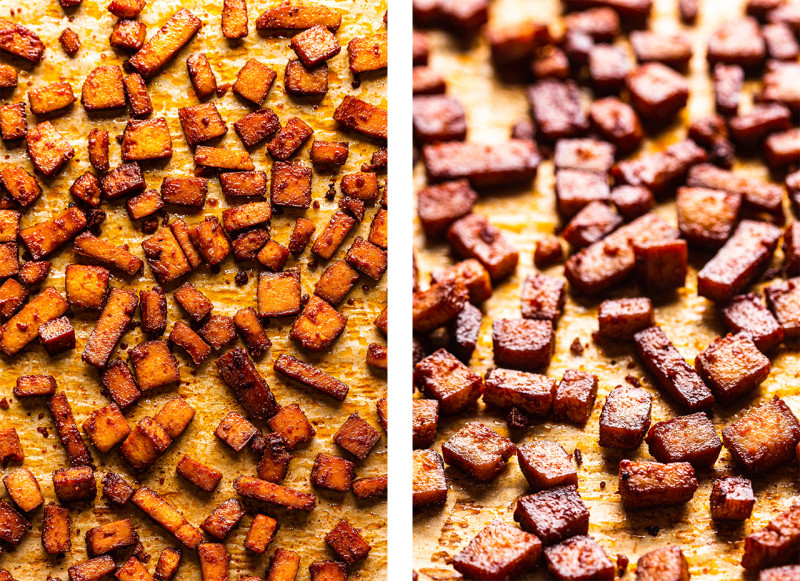
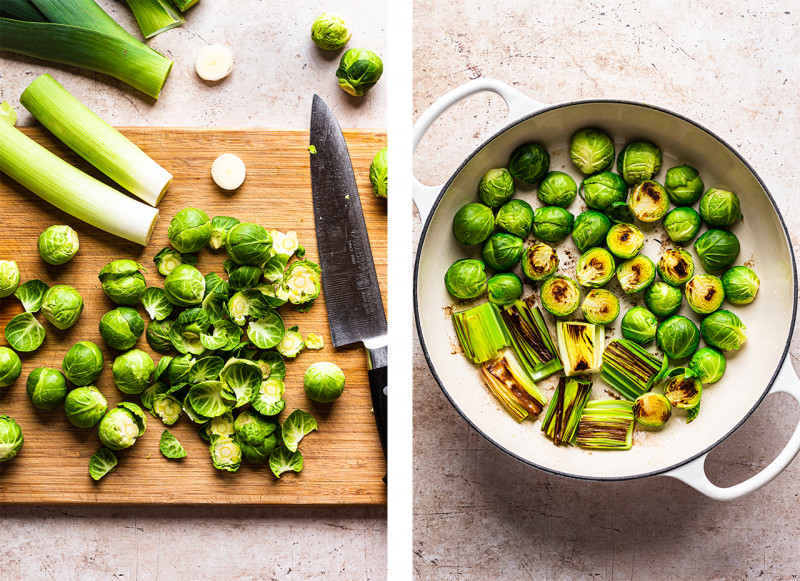
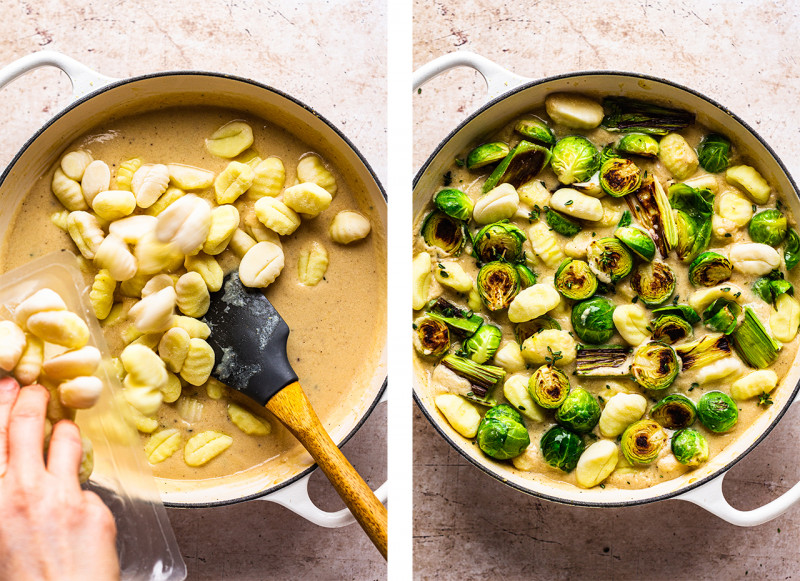
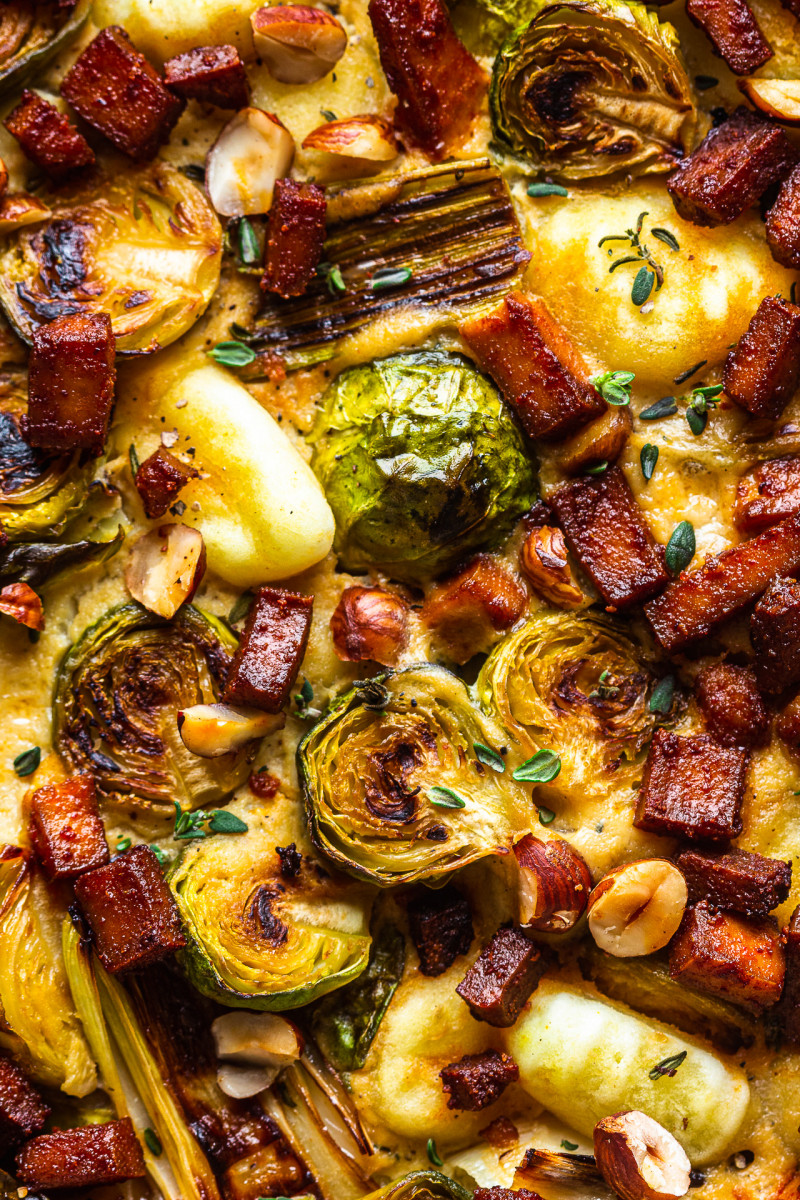

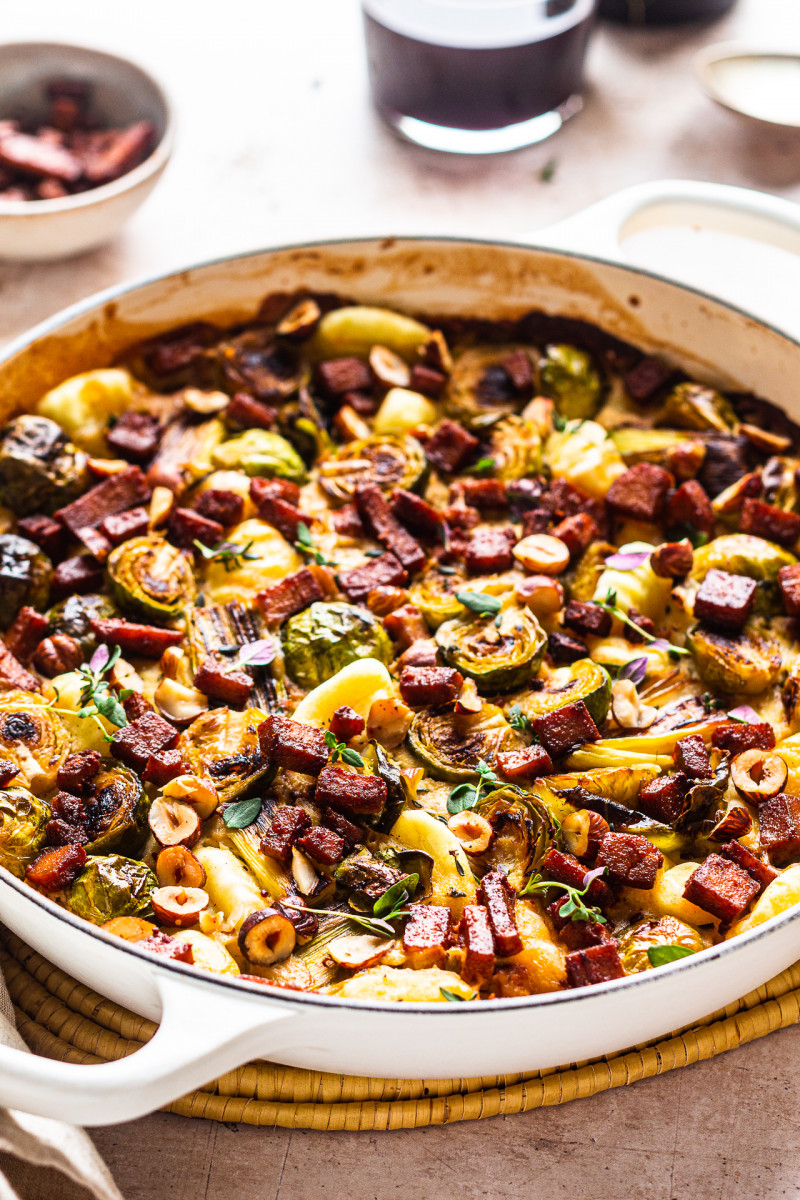
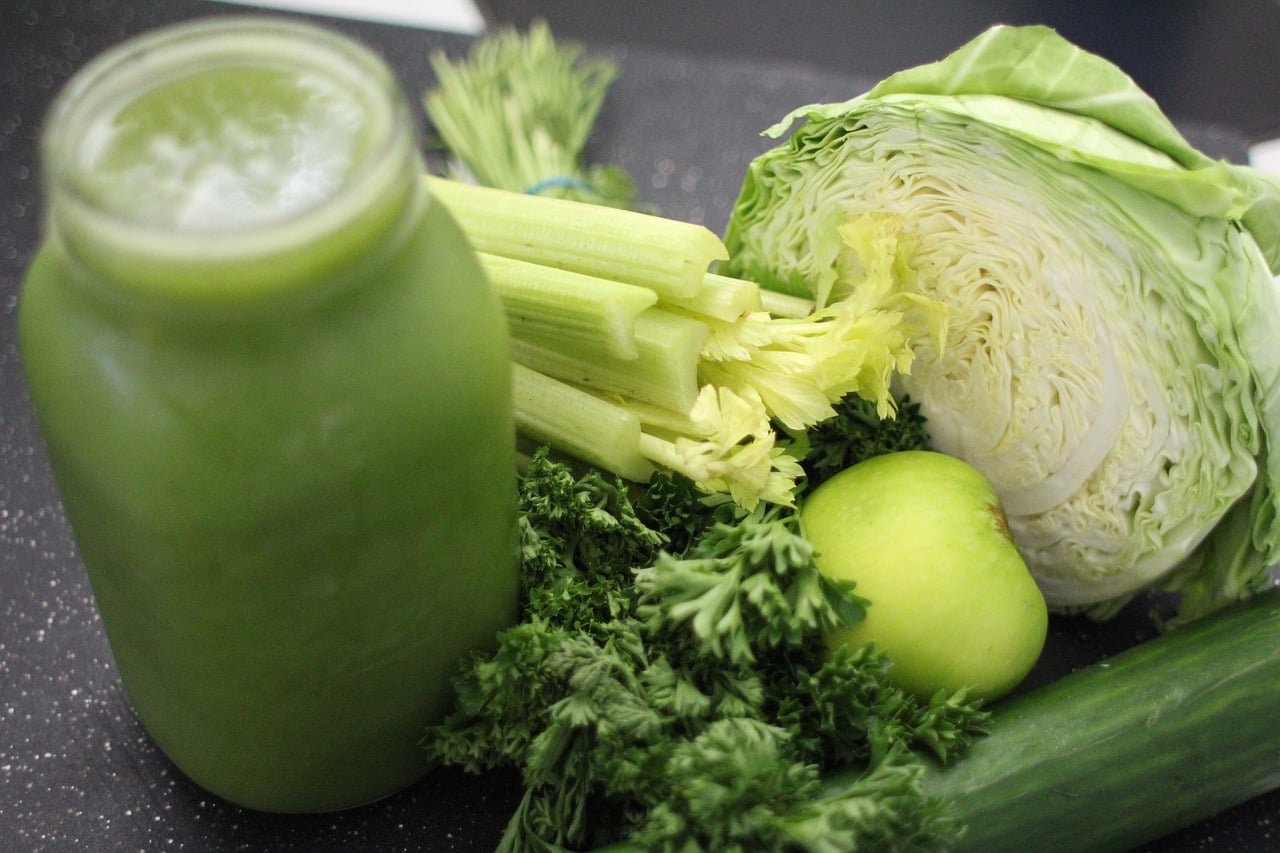



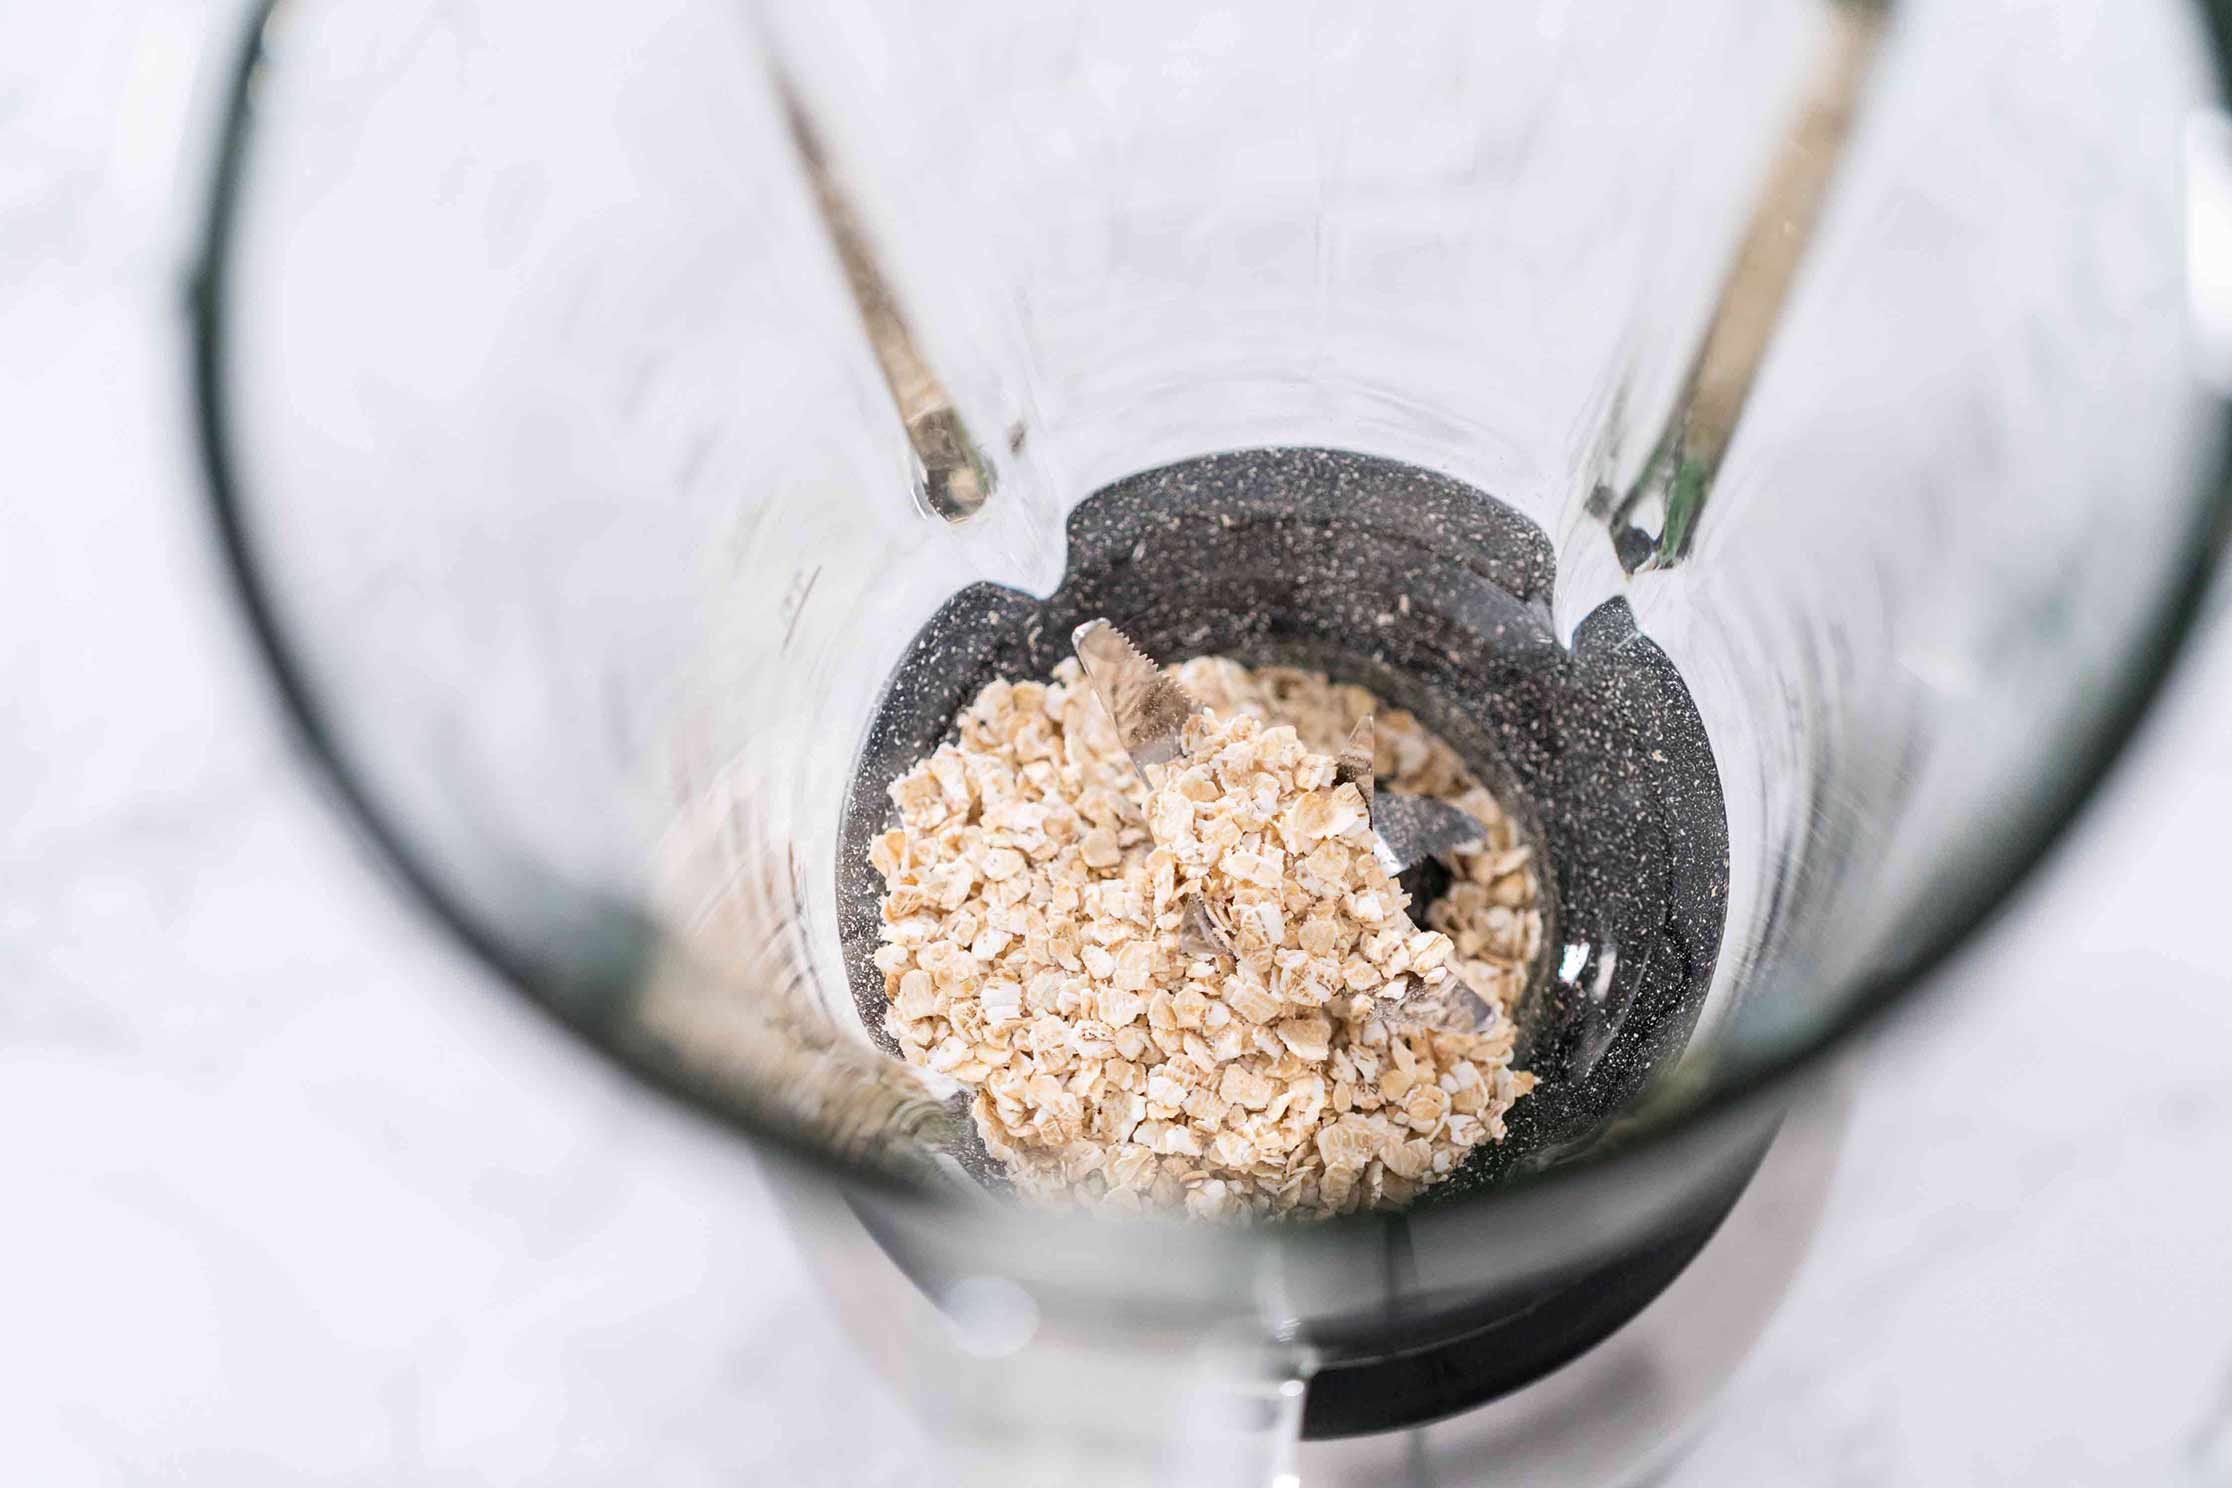
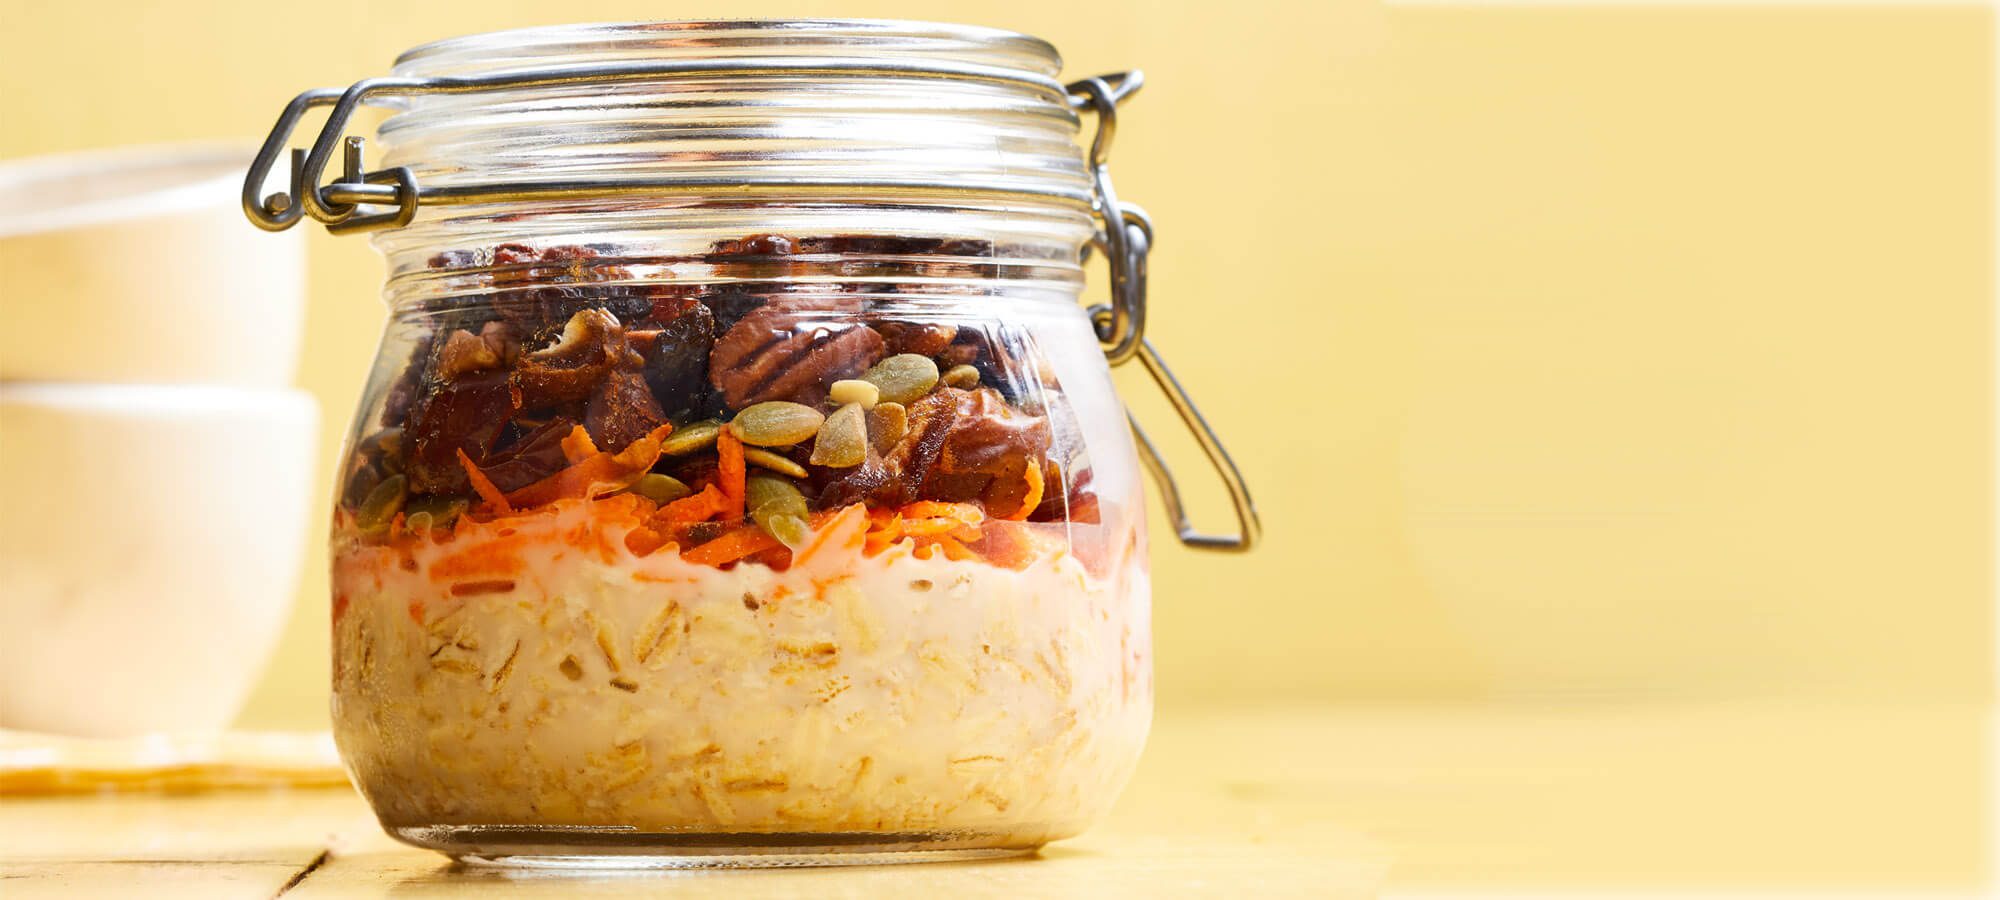

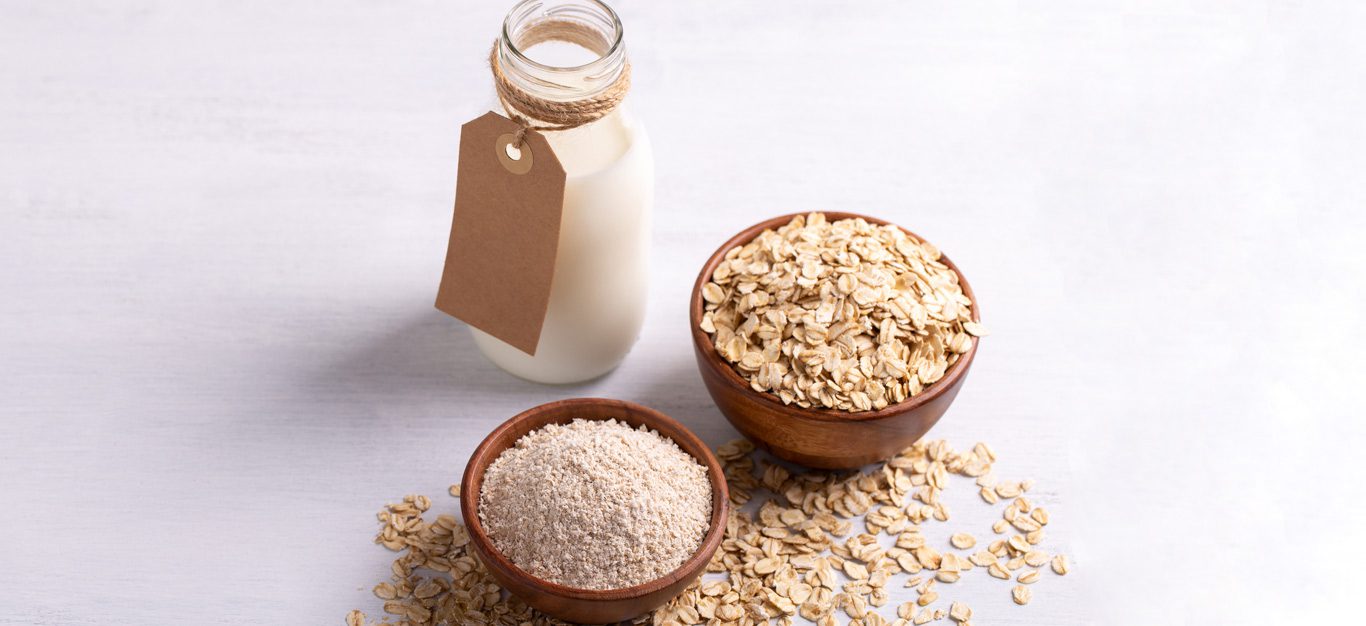




 Read More



 Ingredients: